Seating Chart App Tour: How to Create & Manage Seating Charts with SeatPlanning
Whether you’re planning a wedding reception, a corporate gala, or even a classroom setup, seating arrangements can make or break your event. That’s why tools like SeatPlanning were built, to take the stress out of managing who sits where while keeping RSVPs organized in one place.
In this article, we’ll take you through a step-by-step tour of SeatPlanning, showing how our seating chart app helps you design layouts, import guest lists, collect RSVPs, and deliver polished exports.
Related pages: Wedding Seating Chart Maker · Free Seating Chart Builder
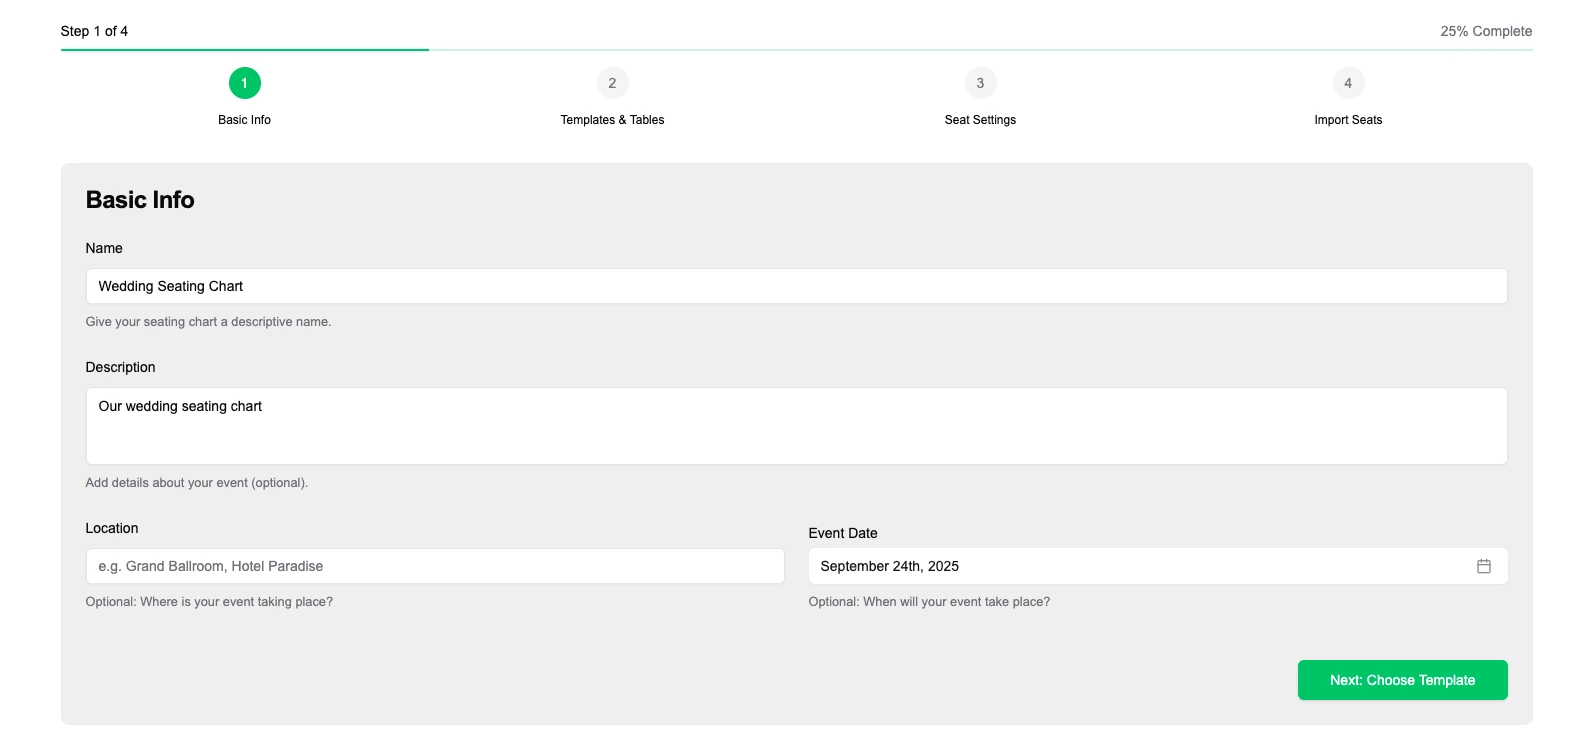
Step 1: Create a Seating Chart Project
The journey starts with creating a new project:
-
Fill in name, description, and optional location/date for your event.
Create Chart
-
Choose between templates (like wedding reception, wedding ceremony, or corporate) or start from scratch.
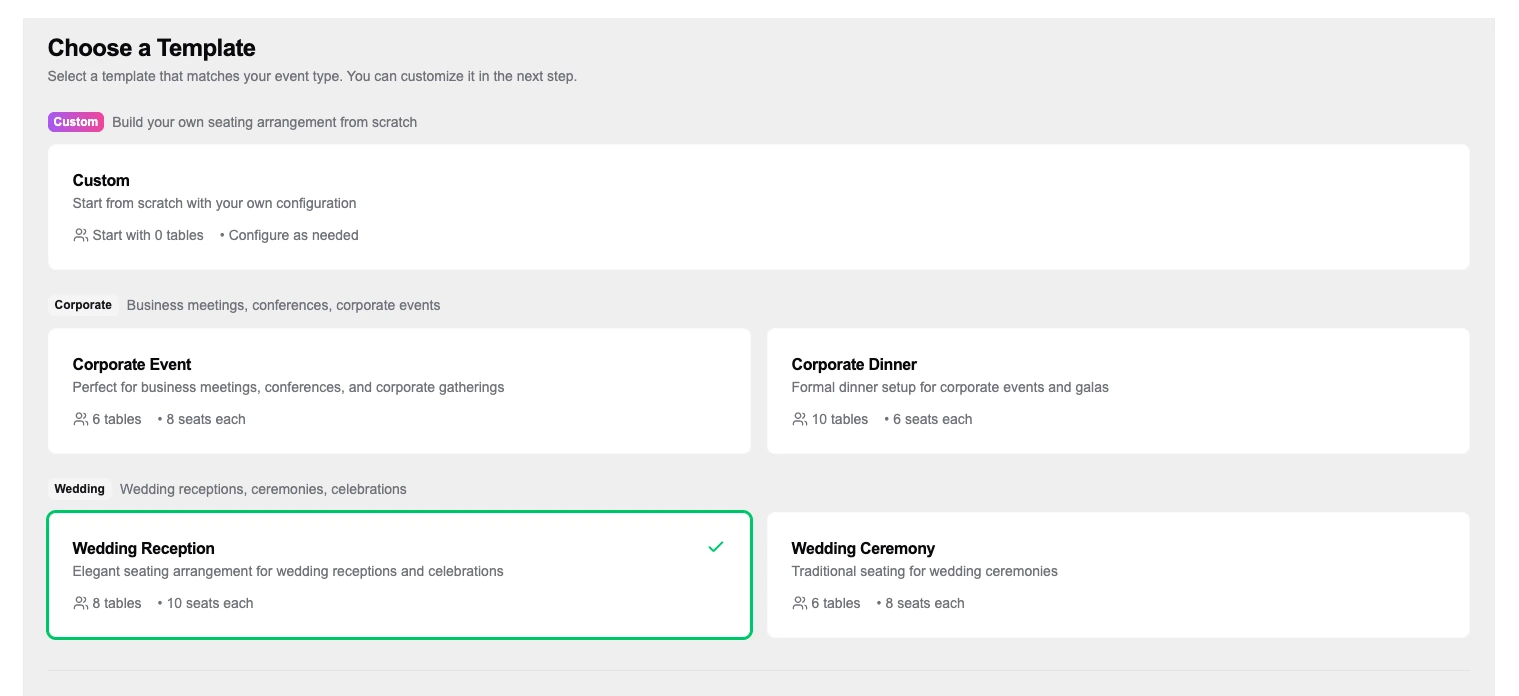
Choose Template
-
Define the number of tables, seats per table, and customize table styles (border, background colors).
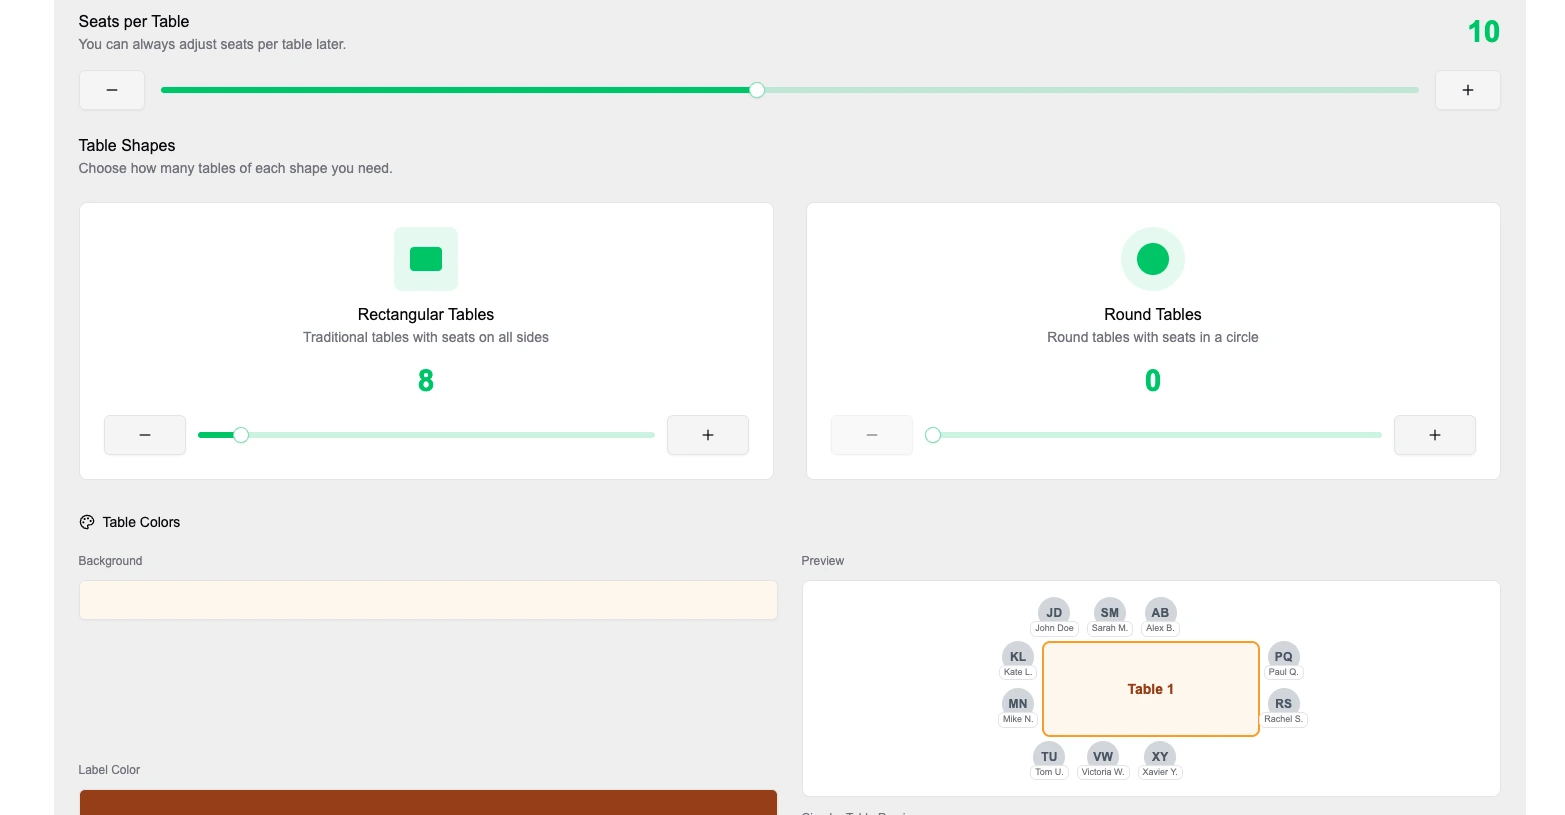
Configure Tables
-
Decide which fields to collect for each seat: first name, last name, phone, RSVP confirmation, email confirmation, plus custom fields (text, select, yes/no). These fields also appear for guests during RSVP, ensuring you capture all the info you need.
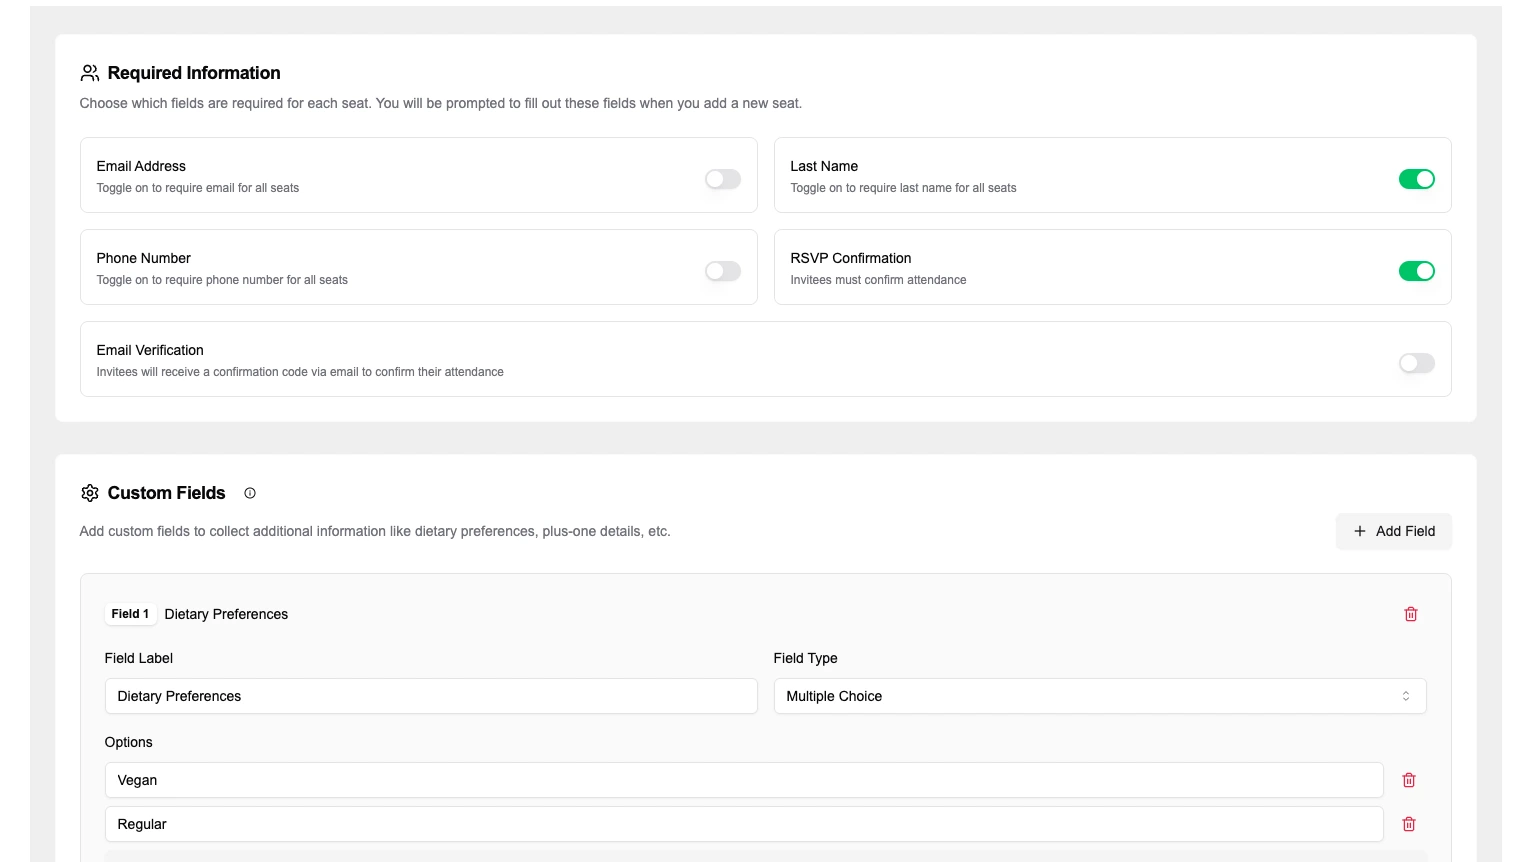
Seat Settings
Step 2: Import Seats from Excel
Most event planners start with a spreadsheet. SeatPlanning makes that transition simple:
- Import your Excel file.
- Map each column to the fields you set earlier (e.g., first name, last name, phone).
- Map guests to groups, which are visually color-coded on the seating chart so you can keep teams, families, or departments together.
This feature alone saves hours of manual copy-pasting and prevents common spreadsheet errors.
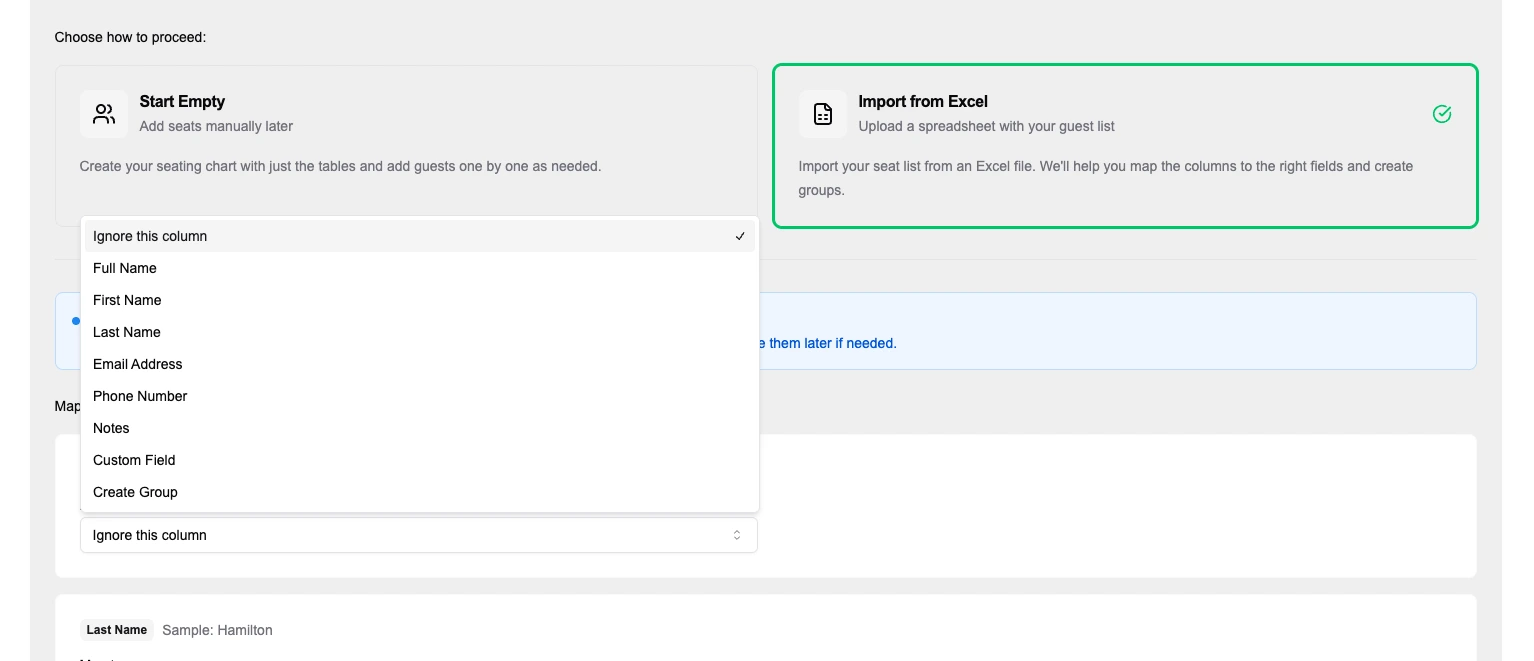
Import Seats
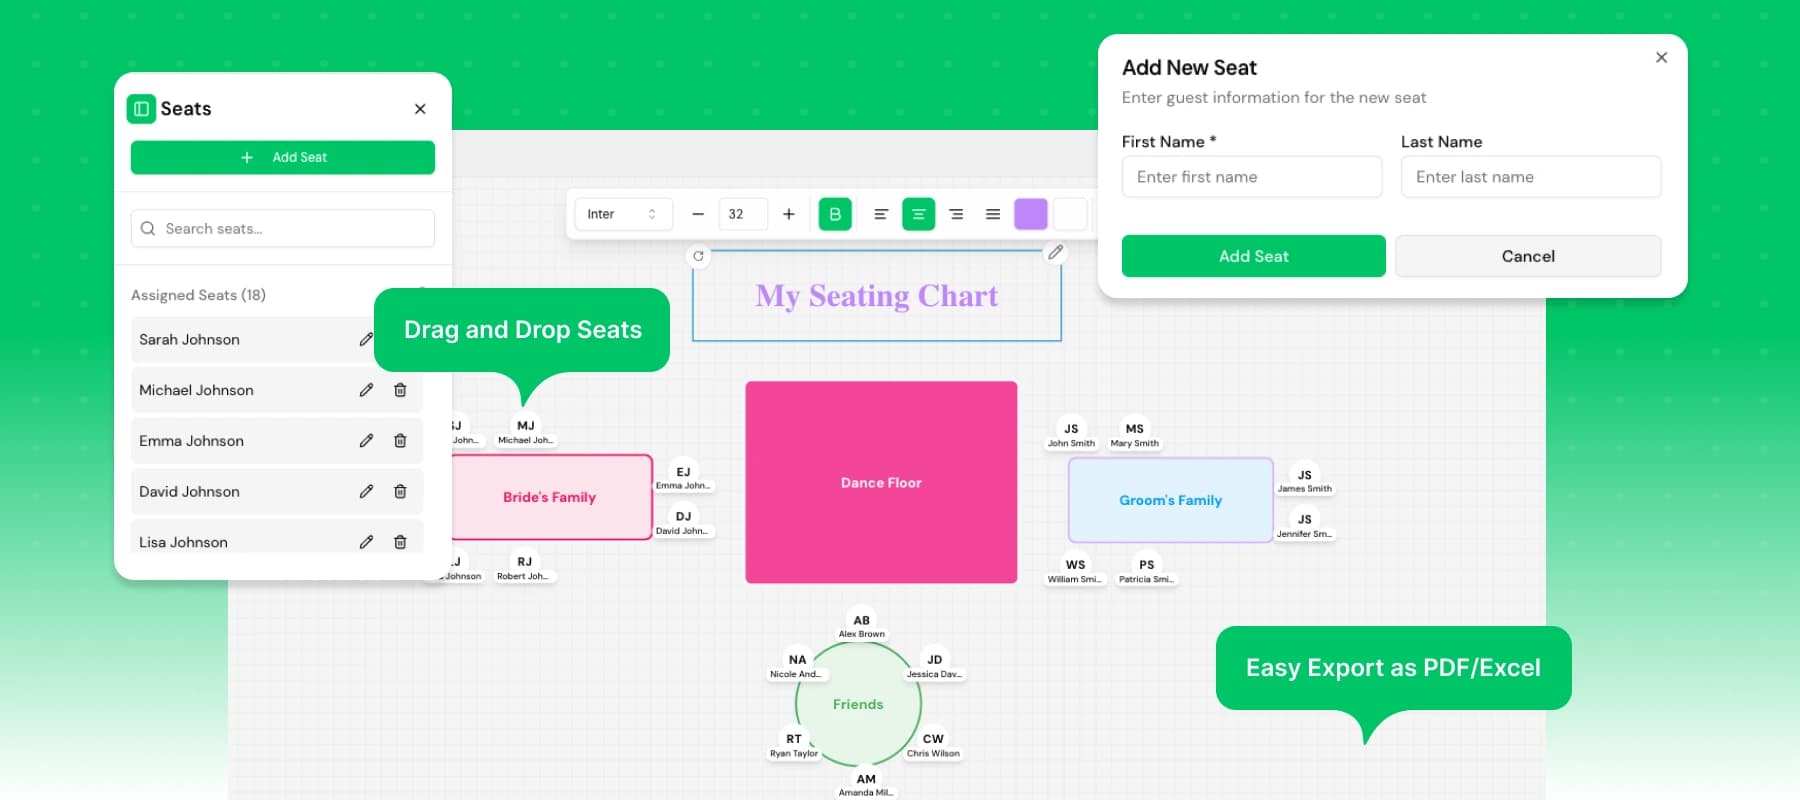
Step 3: Build Your Seating Chart Visually
Now comes the fun part: designing your chart. SeatPlanning works like a design tool (think Figma, but for events). You can:
- Drag and drop tables (rectangular or circular), seats, or containers (like rows of chairs).
- Add text labels, shapes, images, and icons to personalize your layout.
- Apply colors, styles, and adjustments until your chart looks exactly how you need it.
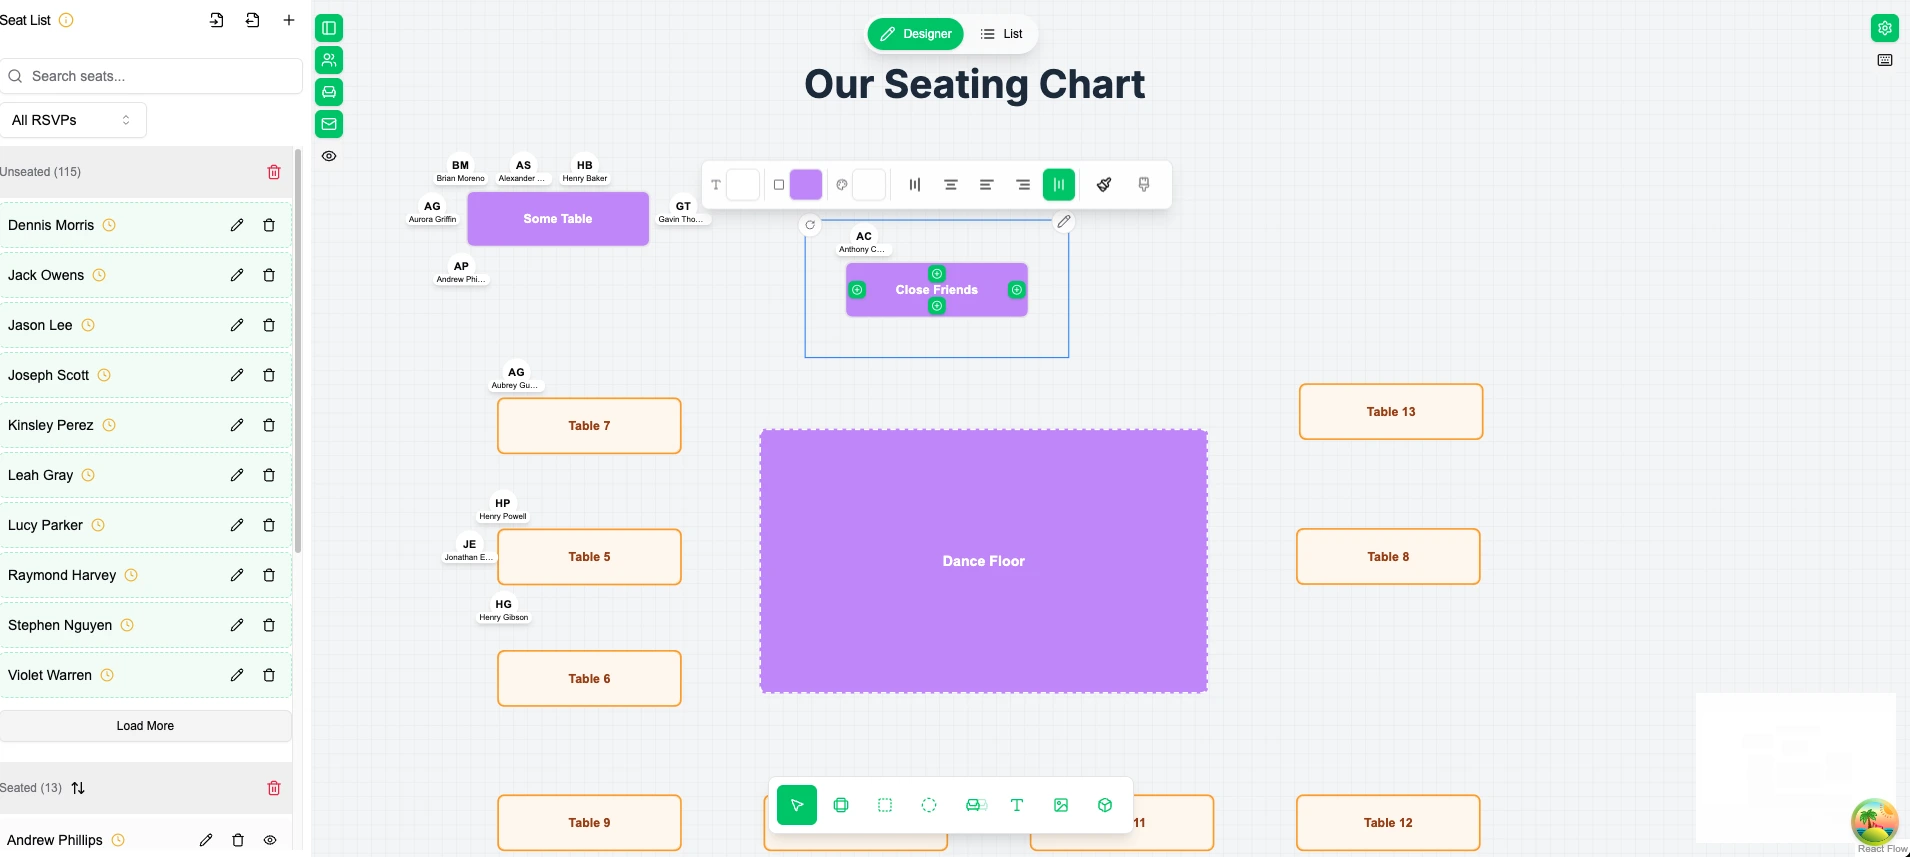
Build Your Seating Chart
Imported seats appear as unassigned guests, ready to be placed. For speed, you can click “Auto-Assign” and SeatPlanning will arrange guests into tables automatically, keeping groups seated together.
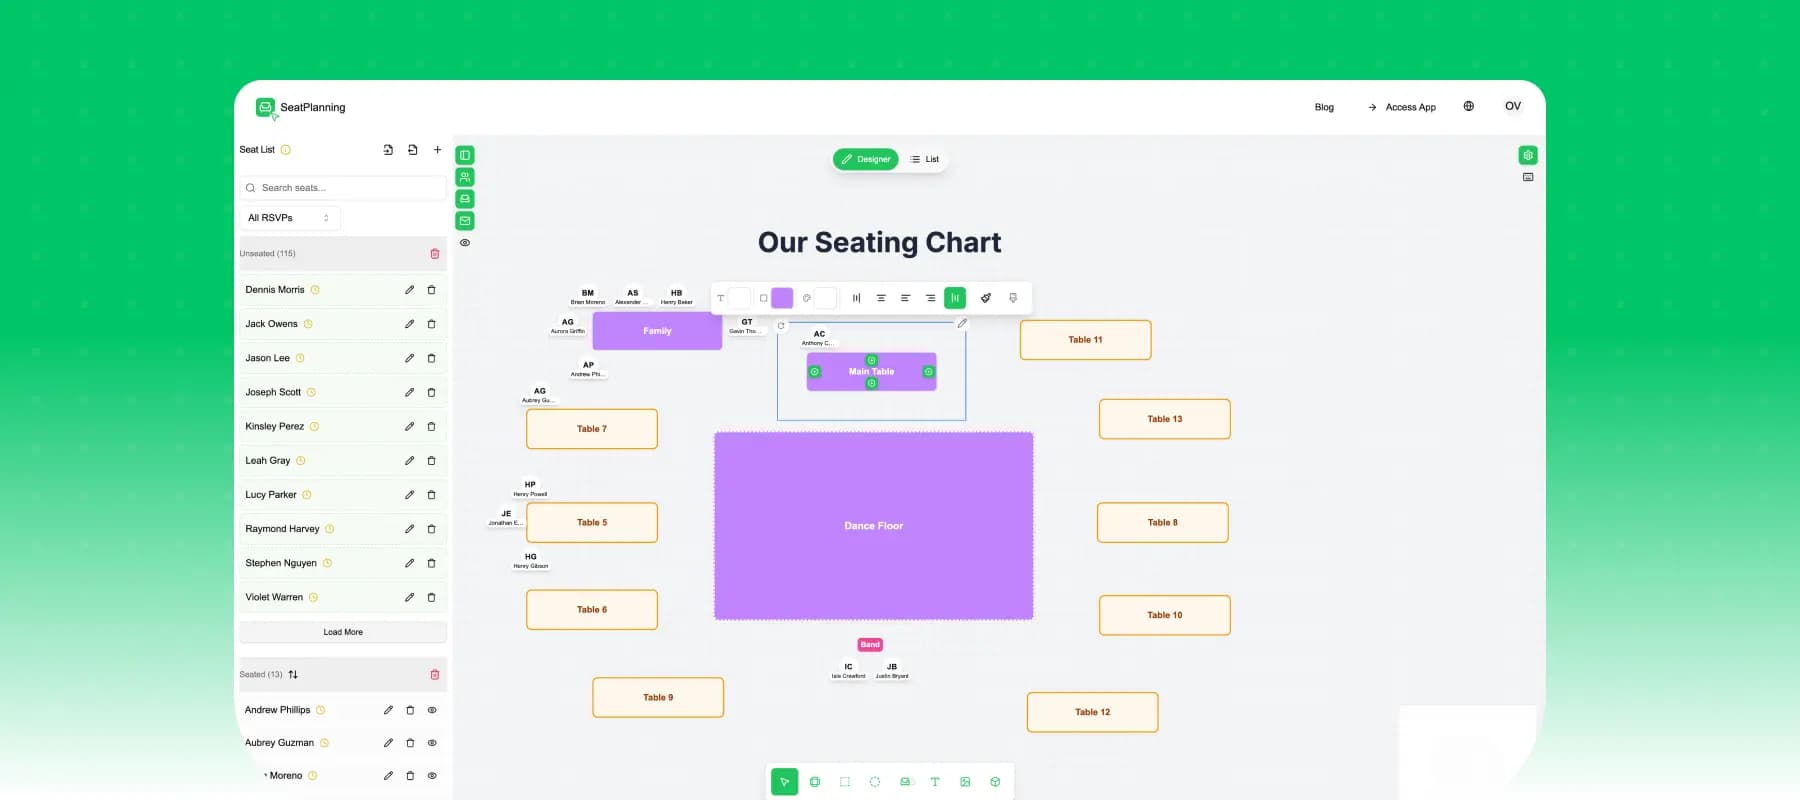
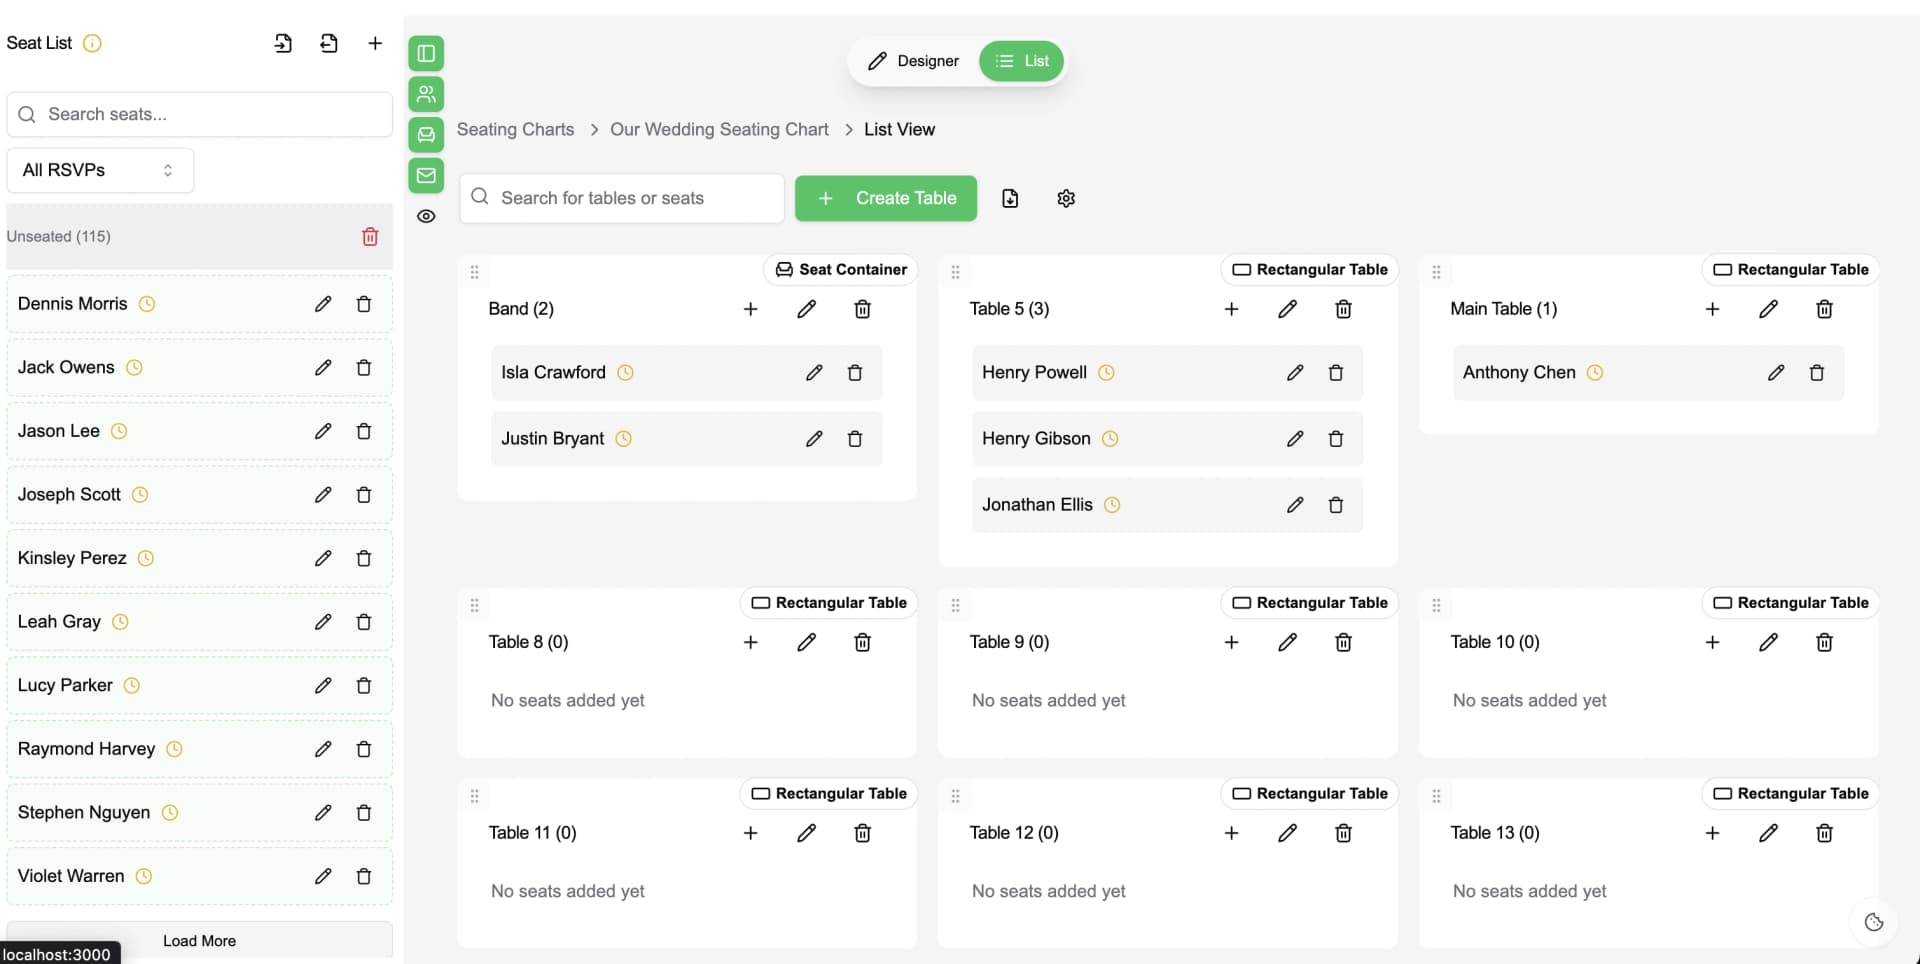
Step 4: Switch Views for Easy Management
Not everyone loves visual design, so SeatPlanning also offers a List View:
- See tables as cards, with seats listed below.
- Drag and drop seats between tables or unassign them quickly.
- Reorder tables with simple drag motions.
This makes it easy to manage large guest lists without needing to stay in the editor.
Switch Views
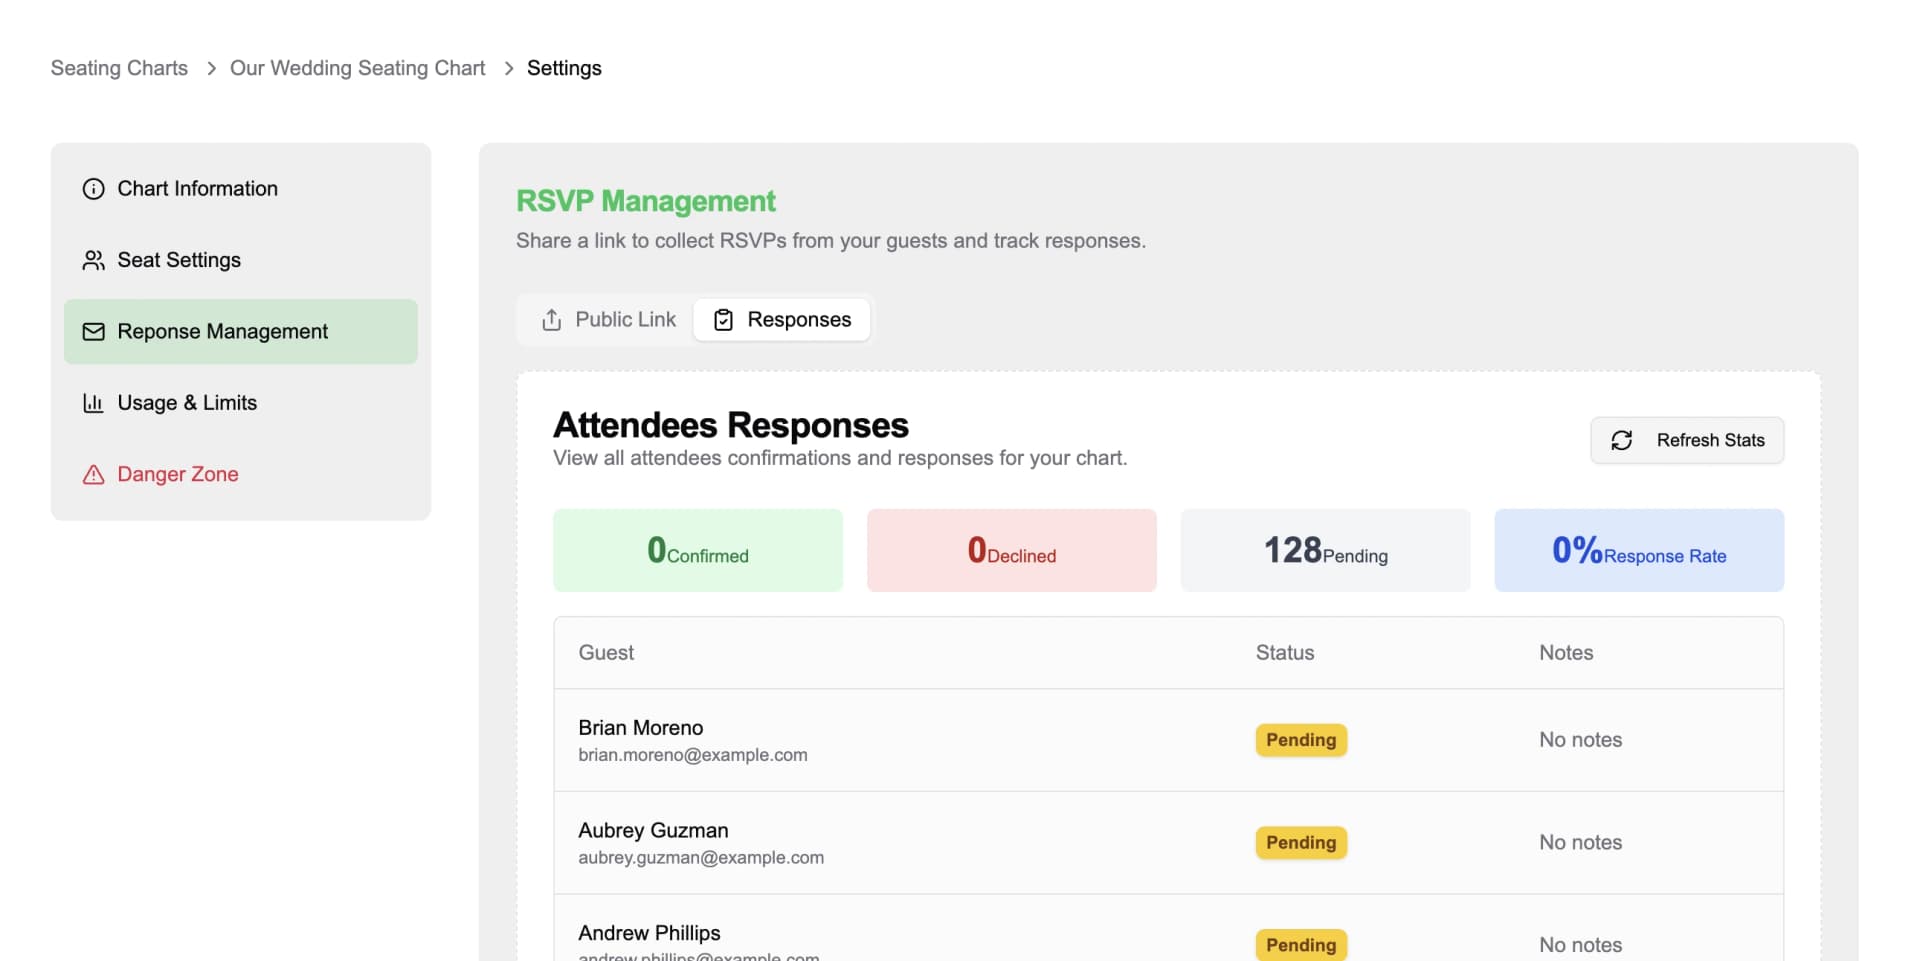
Step 5: Collect RSVPs Online
A seating chart isn’t complete without knowing who’s actually attending. SeatPlanning solves this with integrated RSVP tools:
- Generate a unique RSVP link to share with guests.
- Guests can search for their name, confirm attendance, and (if required) verify via email confirmation.
- Custom fields are filled in during RSVP (e.g., meal preference, role, or yes/no questions).
As responses roll in, you’ll see a dashboard with statistics: positive, negative, pending replies, and percentage response rate. You can also manually update responses if needed.
Collect RSVPs
Step 6: Export Your Seating Chart
Once your event is ready, SeatPlanning lets you export everything in polished formats:
-
PDF Export – styled layouts with templates (wedding or corporate themes), including table lists and names. Perfect for sharing with staff.
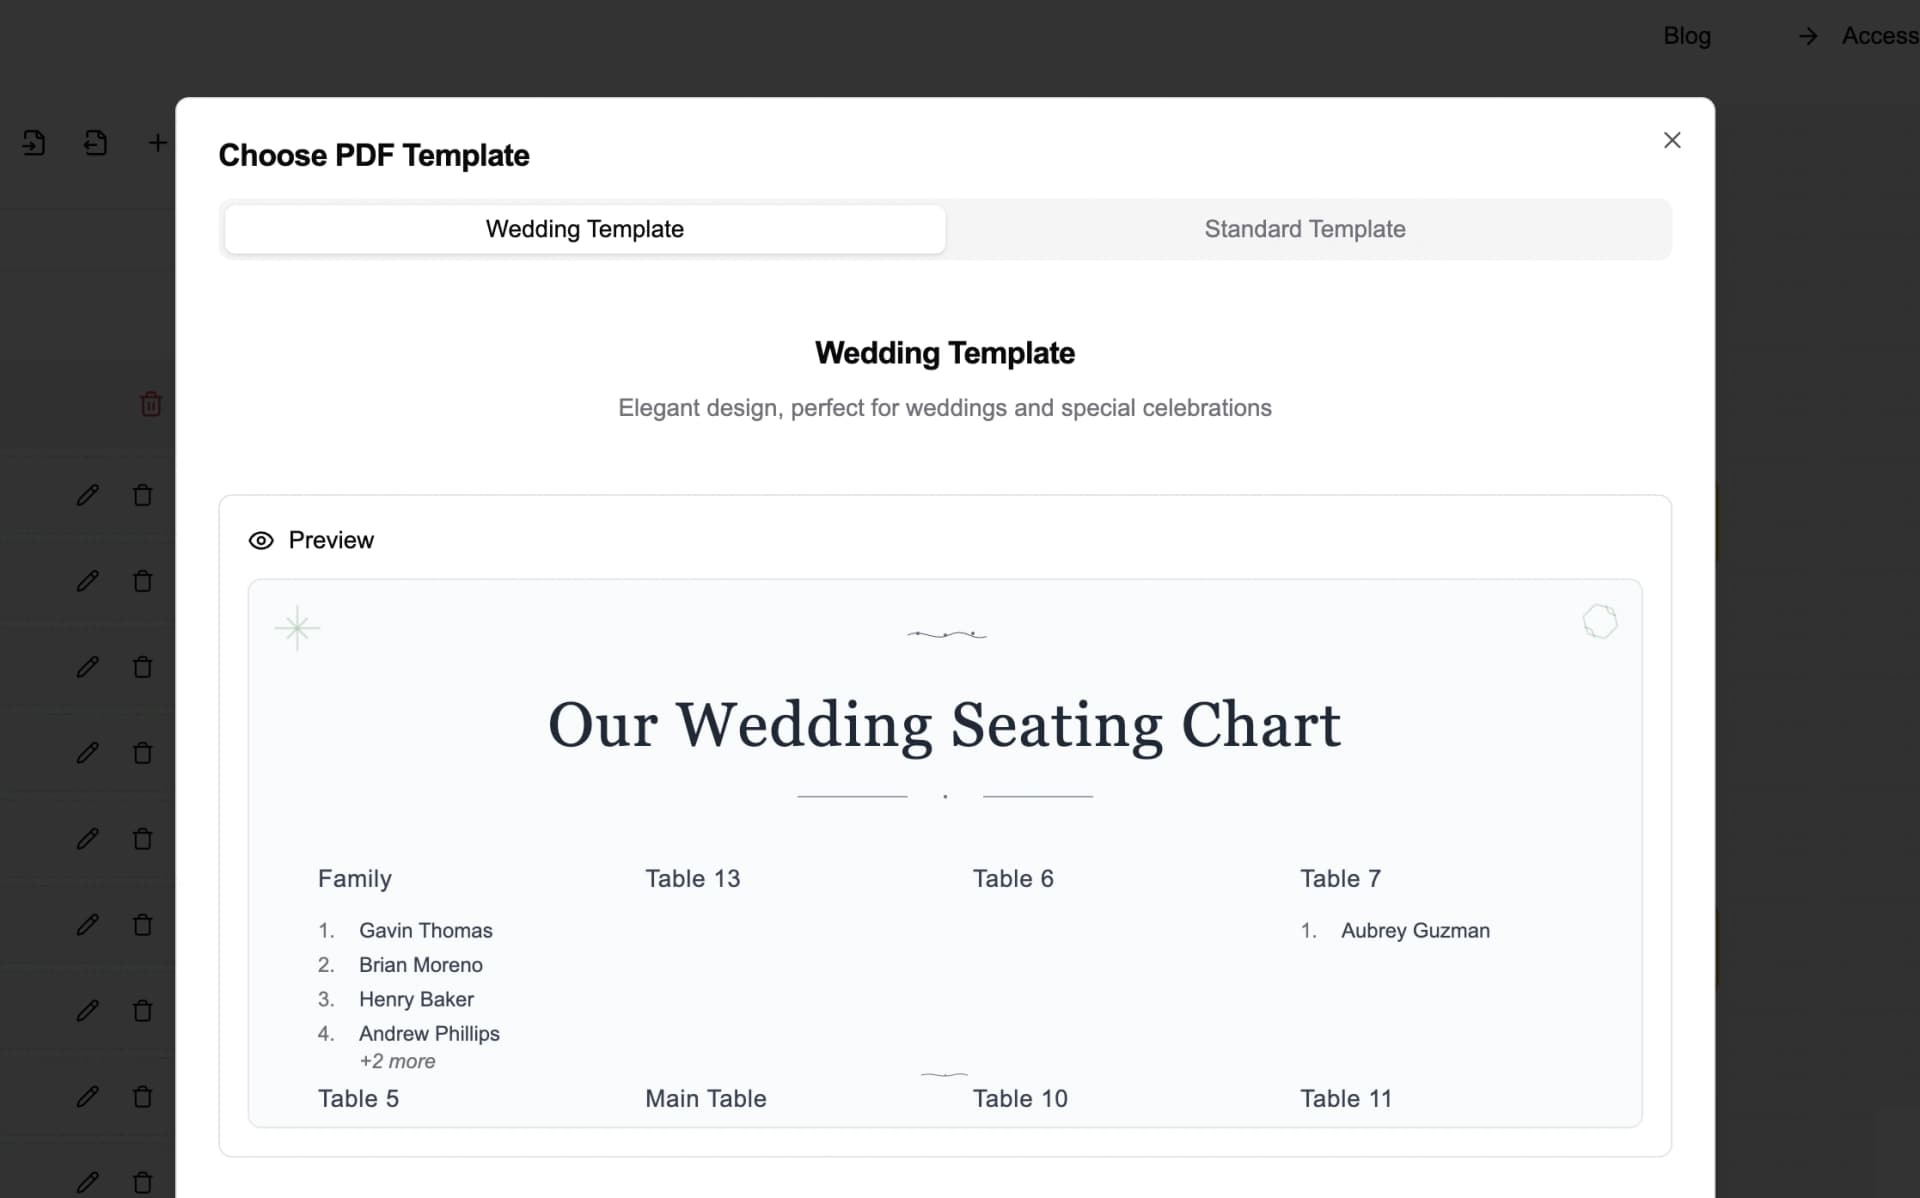
PDF Export
-
Excel Export – each table is exported as a sheet. Choose which fields to include (first name, last name, custom fields, etc.). Ideal for data-heavy planners.
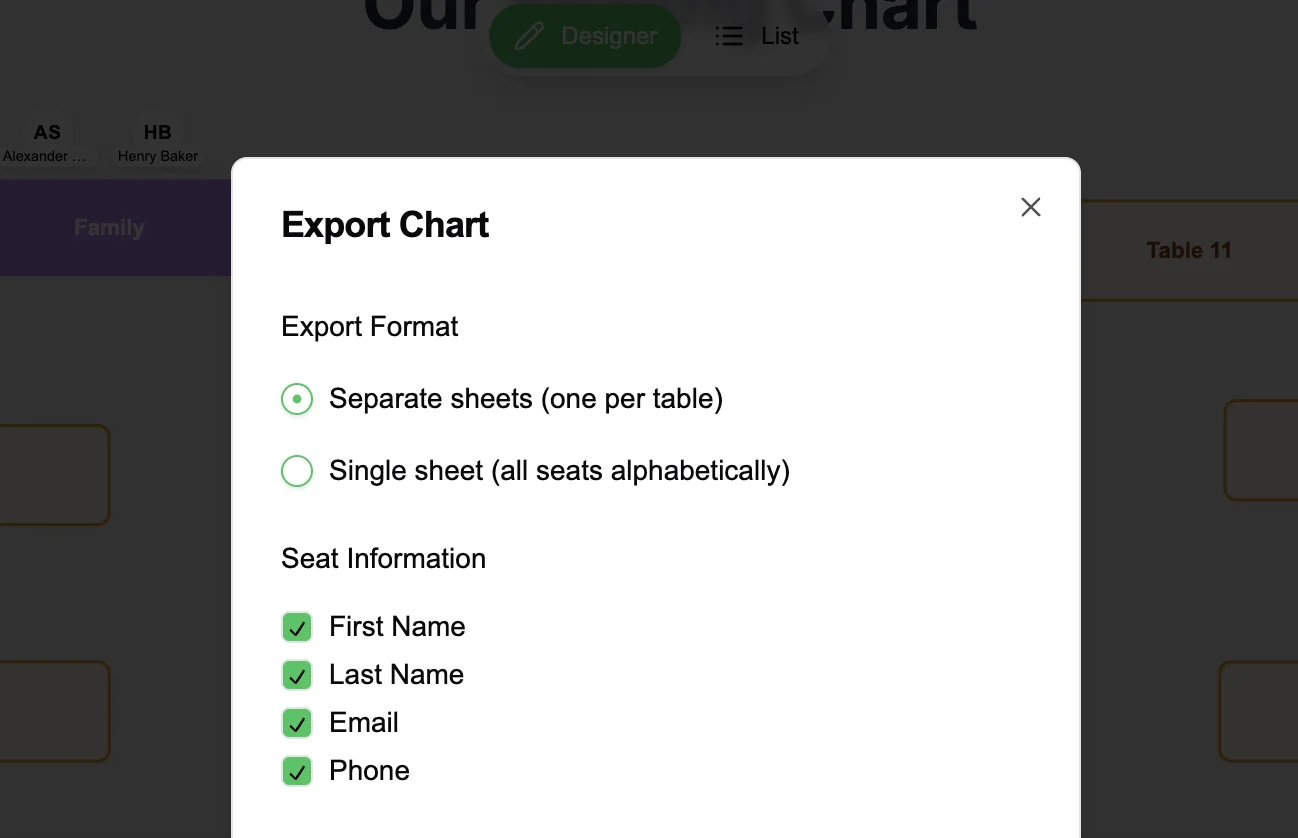
Excel Export
These exports save time and give you professional documentation for your event.
Why SeatPlanning Stands Out as a Seating Chart App
There are many event tools out there, but SeatPlanning brings everything together:
- All-in-one workflow: from design to RSVP to export.
- Visual + list views for flexible planning styles.
- Smart group management so families, teams, or departments stay together.
- Customizable fields to capture the exact guest data you need.
It’s designed for any event type: weddings, conferences, banquets, galas, classrooms, and beyond.
Final Thoughts
Seating charts are no longer just about placing people in chairs — they’re about making the event flow seamlessly. With SeatPlanning, you can move beyond messy spreadsheets and start planning events with confidence, accuracy, and style.
👉 Ready to try a modern seating chart app? Join our waitlist or Create an account today. SeatPlanning helps you plan smarter and stress less.