Getting around the editor
The editor is where you lay out your room and seat your guests. Here are the three areas you'll use most: the seats panel, the canvas, and the toolbar.
The editor is where you build your seating plan. It has three areas you'll use all the time: the seats panel on the left, the canvas in the middle, and the toolbar along the bottom.
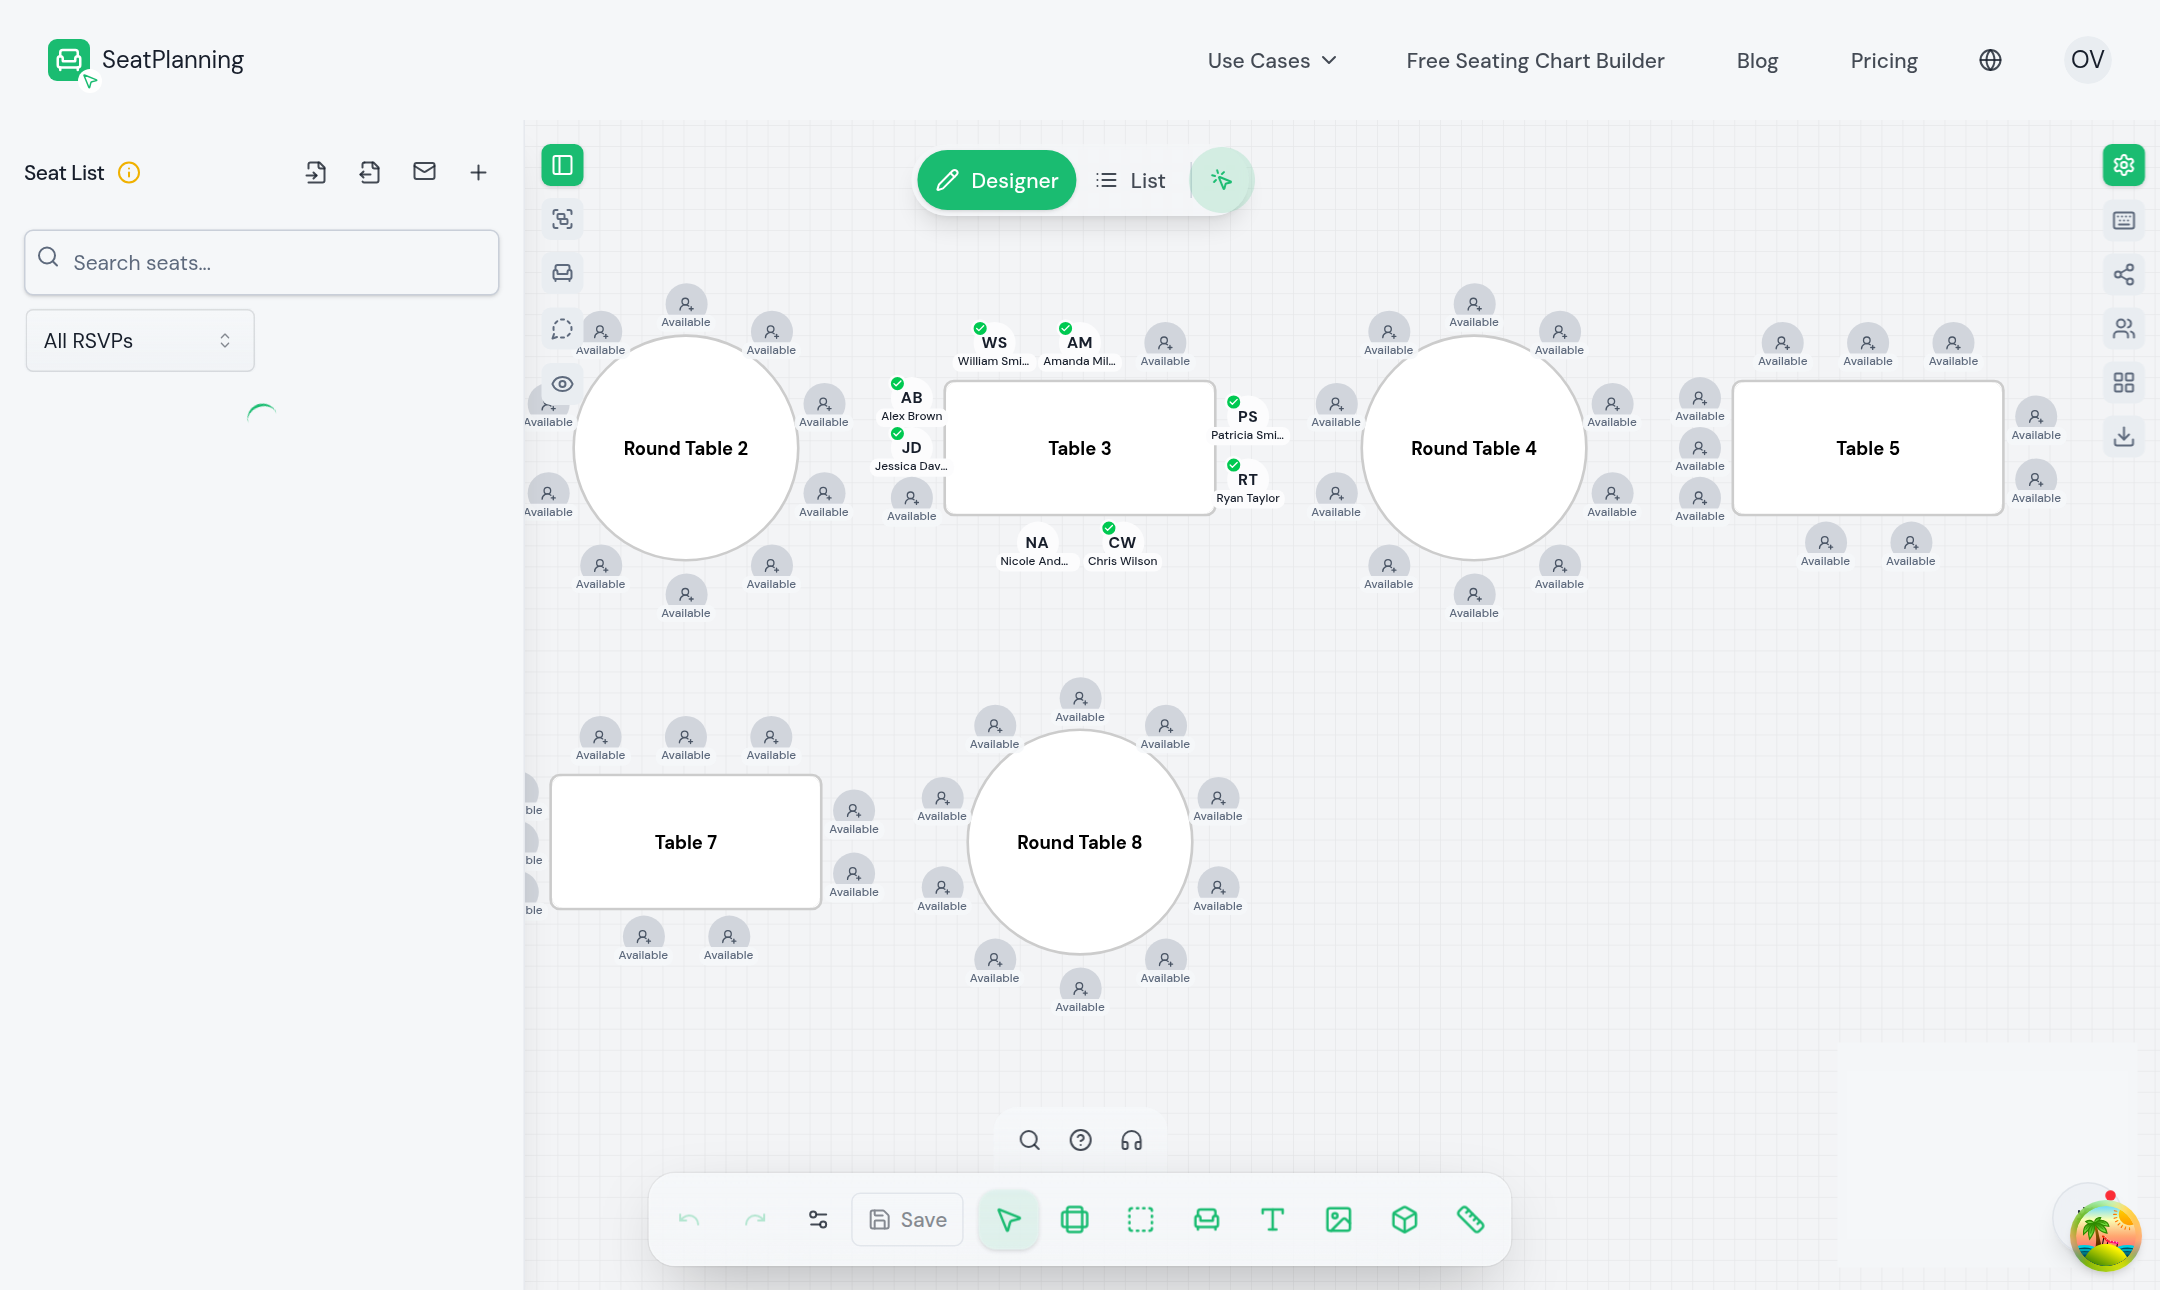
- 1The seats panel. Add guests, search your list, and filter by RSVP status.
- 2The canvas. Drag tables and seats around to lay out your room.
- 3A seated guest. The green check means they have confirmed.
- 4The toolbar. Add tables, rows, areas, text, and images, then save.
The seats panel
The panel on the left is your guest list. From here you can add a guest, search for someone by name, and filter by whether they've confirmed. Each guest sits in a seat, and you can open a guest to edit their details.
The canvas
The canvas is your room. You drag tables, rows of seats, and areas (like a stage or a dance floor) into place, and move guests between seats. Zoom with your mouse wheel, and use the fit-to-view control to frame everything at once.
Seats around a table show each guest's initials. A green check means the guest confirmed, and an empty seat is one you haven't filled yet.
The toolbar
The toolbar along the bottom is where you add things to the canvas: tables, areas, rows of seats, text labels, images, icons, and rulers. It also holds undo and redo and the Save button, though your work saves on its own as you go.
Where to go next
- Create your first seating chart if you haven't built one yet.
- Import your guest list from Excel to fill your seats fast.