The Invite Hub, step by step
The Invite Hub walks you from picking an RSVP mode to actually reaching your guests, in one guided flow: choose a mode, optionally customize your page, pick a channel, act, and you're done.
The Invite Hub is a guided path from setting up how guests respond to actually getting invitations out, so you don't have to jump between separate settings screens to do it.
Open it from your chart's Invite Guests menu item, and it walks you through the following steps.
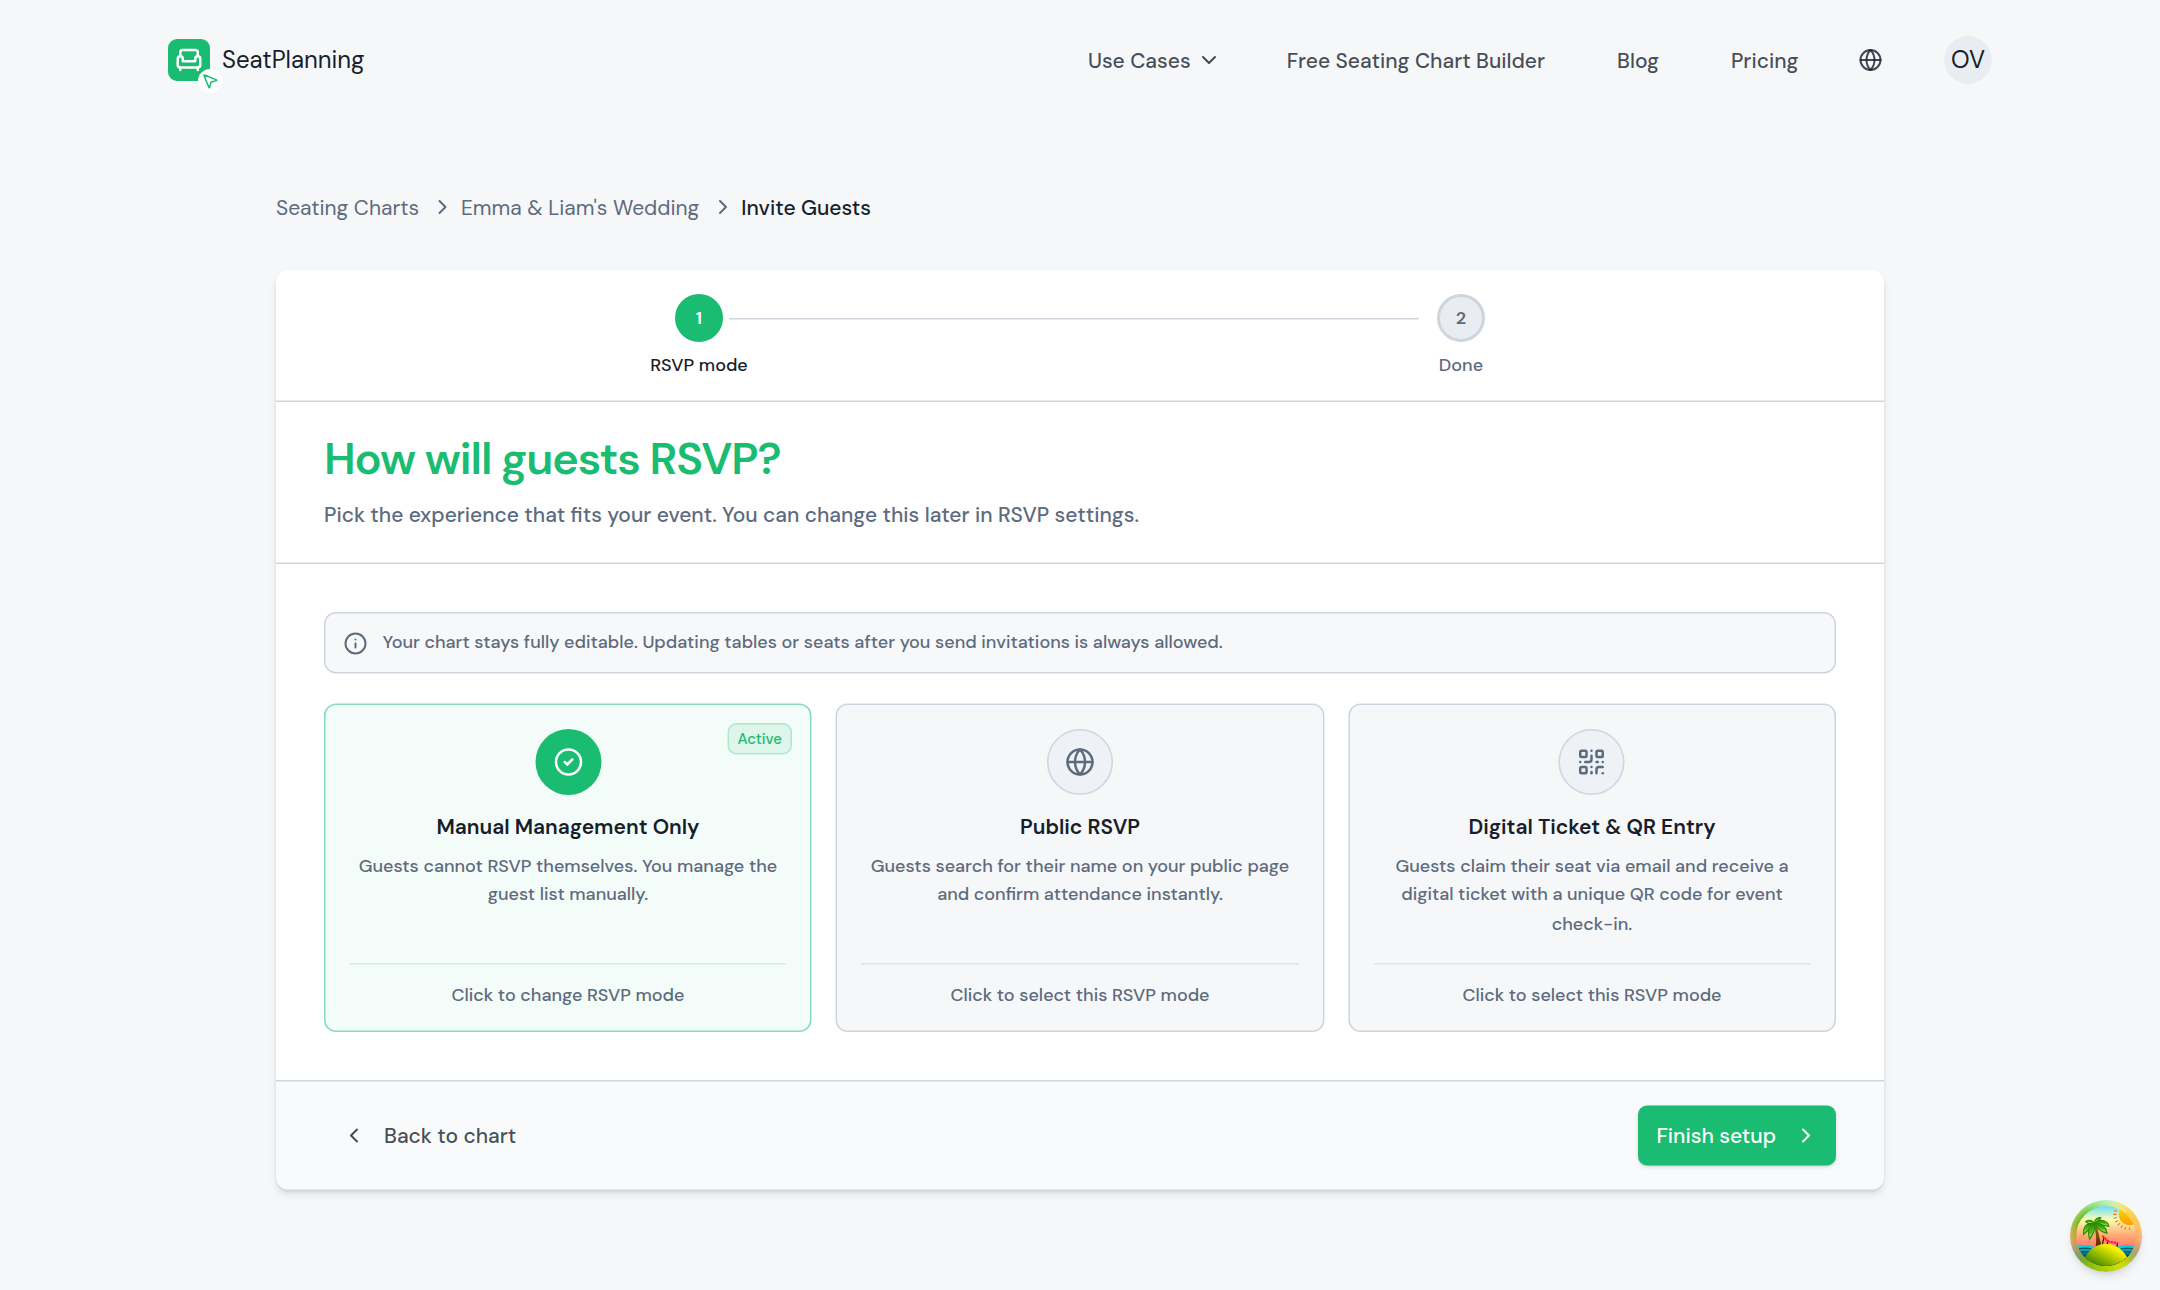
- 1Step 1: choose how guests will respond.
- 2Pick a mode: Manual Management Only, Self-Serve RSVP, or Digital Ticket & QR Entry.
- 3Finish setup, then send invitations or share the link.
1. Pick your RSVP mode
Choose Manual Management Only, Self-Serve RSVP, or Digital Ticket & QR Entry. This is the same setting used everywhere else in the chart, so picking a different mode here changes what your guests see the moment you confirm. If you're not sure which to pick, see Choosing an RSVP mode.
Manual Management Only skips straight to a reminder that you're managing guests yourself, since there's no page or invitation to send.
2. Customize your page (optional)
For Self-Serve RSVP and Digital Ticket & QR Entry, you can adjust your RSVP or claim page here: templates, colors, logo, and wording. This step is optional. Select Skip for now if your page is already the way you want it, or if you'd rather come back to design later from RSVP Pages.
3. Choose your channel
Decide how you want to reach guests:
- Email invitations: send invitations from your guest roster using the email wizard.
- Share invitation link: get your public link ready to copy or send however you like, outside of SeatPlanning's own emails.
Digital Ticket & QR Entry is built around personal claim links sent by email, so it moves you straight into the email wizard rather than offering a separate link to share.
4. Take the channel action
If you chose email, you land in the email wizard to compose, pick recipients, and send. See Send email invitations for that flow in detail. If you chose the link, you get a ready-to-copy public link along with quick sharing options.
5. Done
The last step recaps the mode and channel you picked, with shortcuts to track responses or manage your guest list next. From here you can head back into the Invite Hub any time to send another round or switch things up.
Where to go next
- Choosing an RSVP mode to compare Manual Management Only, Self-Serve RSVP, and Digital Ticket & QR Entry in more depth.
- Send email invitations for the full walkthrough of the email channel.
- Turn on Self-Serve RSVP if you want your shareable link ready before you open the hub.