From seating chart to check-in: the complete walkthrough
One walkthrough connecting every piece: build your seating chart, invite guests by email, and check them in with QR codes at the door.
This is the whole path, start to finish: laying out tables on the canvas, adding your guest list, designing and sending your invitation, and checking guests in with a QR code at the door. Each section links to a deeper article if you want more detail on that one step.
1. Build your seating chart
Everything starts on the canvas. Create a chart, then drag tables, areas, and text onto the layout the way you'd arrange a room.
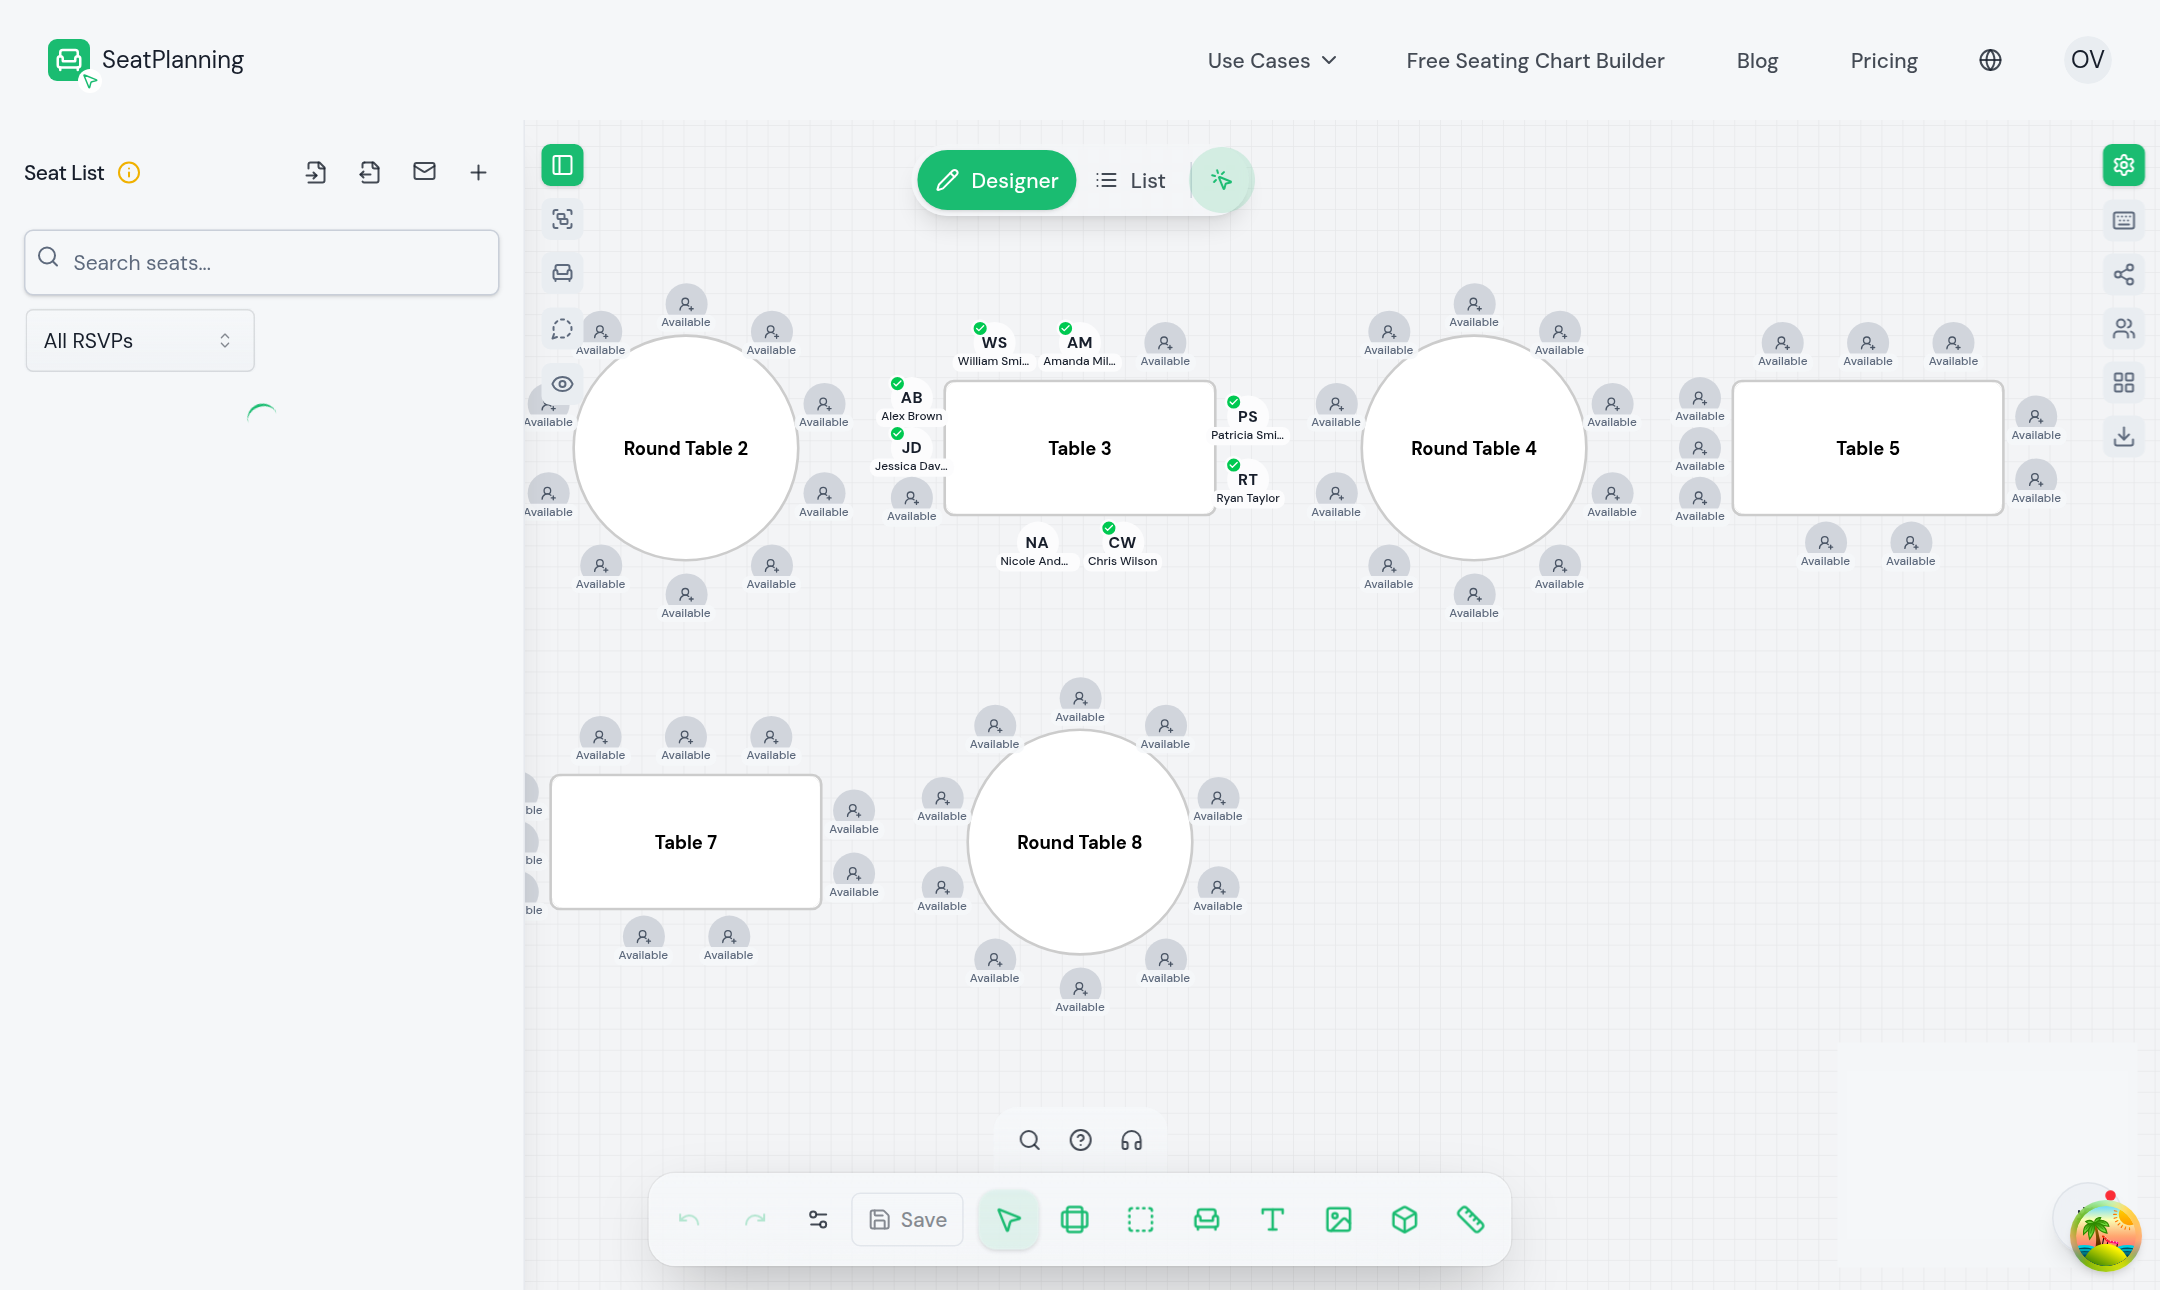
- 1Toolbar: tables, areas, text, and other elements.
- 2Your layout. Drag, resize, and rotate tables here.
Round tables, rectangular tables, and rows of seats all work the same way: place one, then set how many seats it needs. See Editor basics for the full set of tools, or Create your first seating chart if you're starting from the setup wizard.
2. Add your guests
With tables on the canvas, add the people who'll sit in them. Type guests in one at a time, or import a whole list from a spreadsheet.
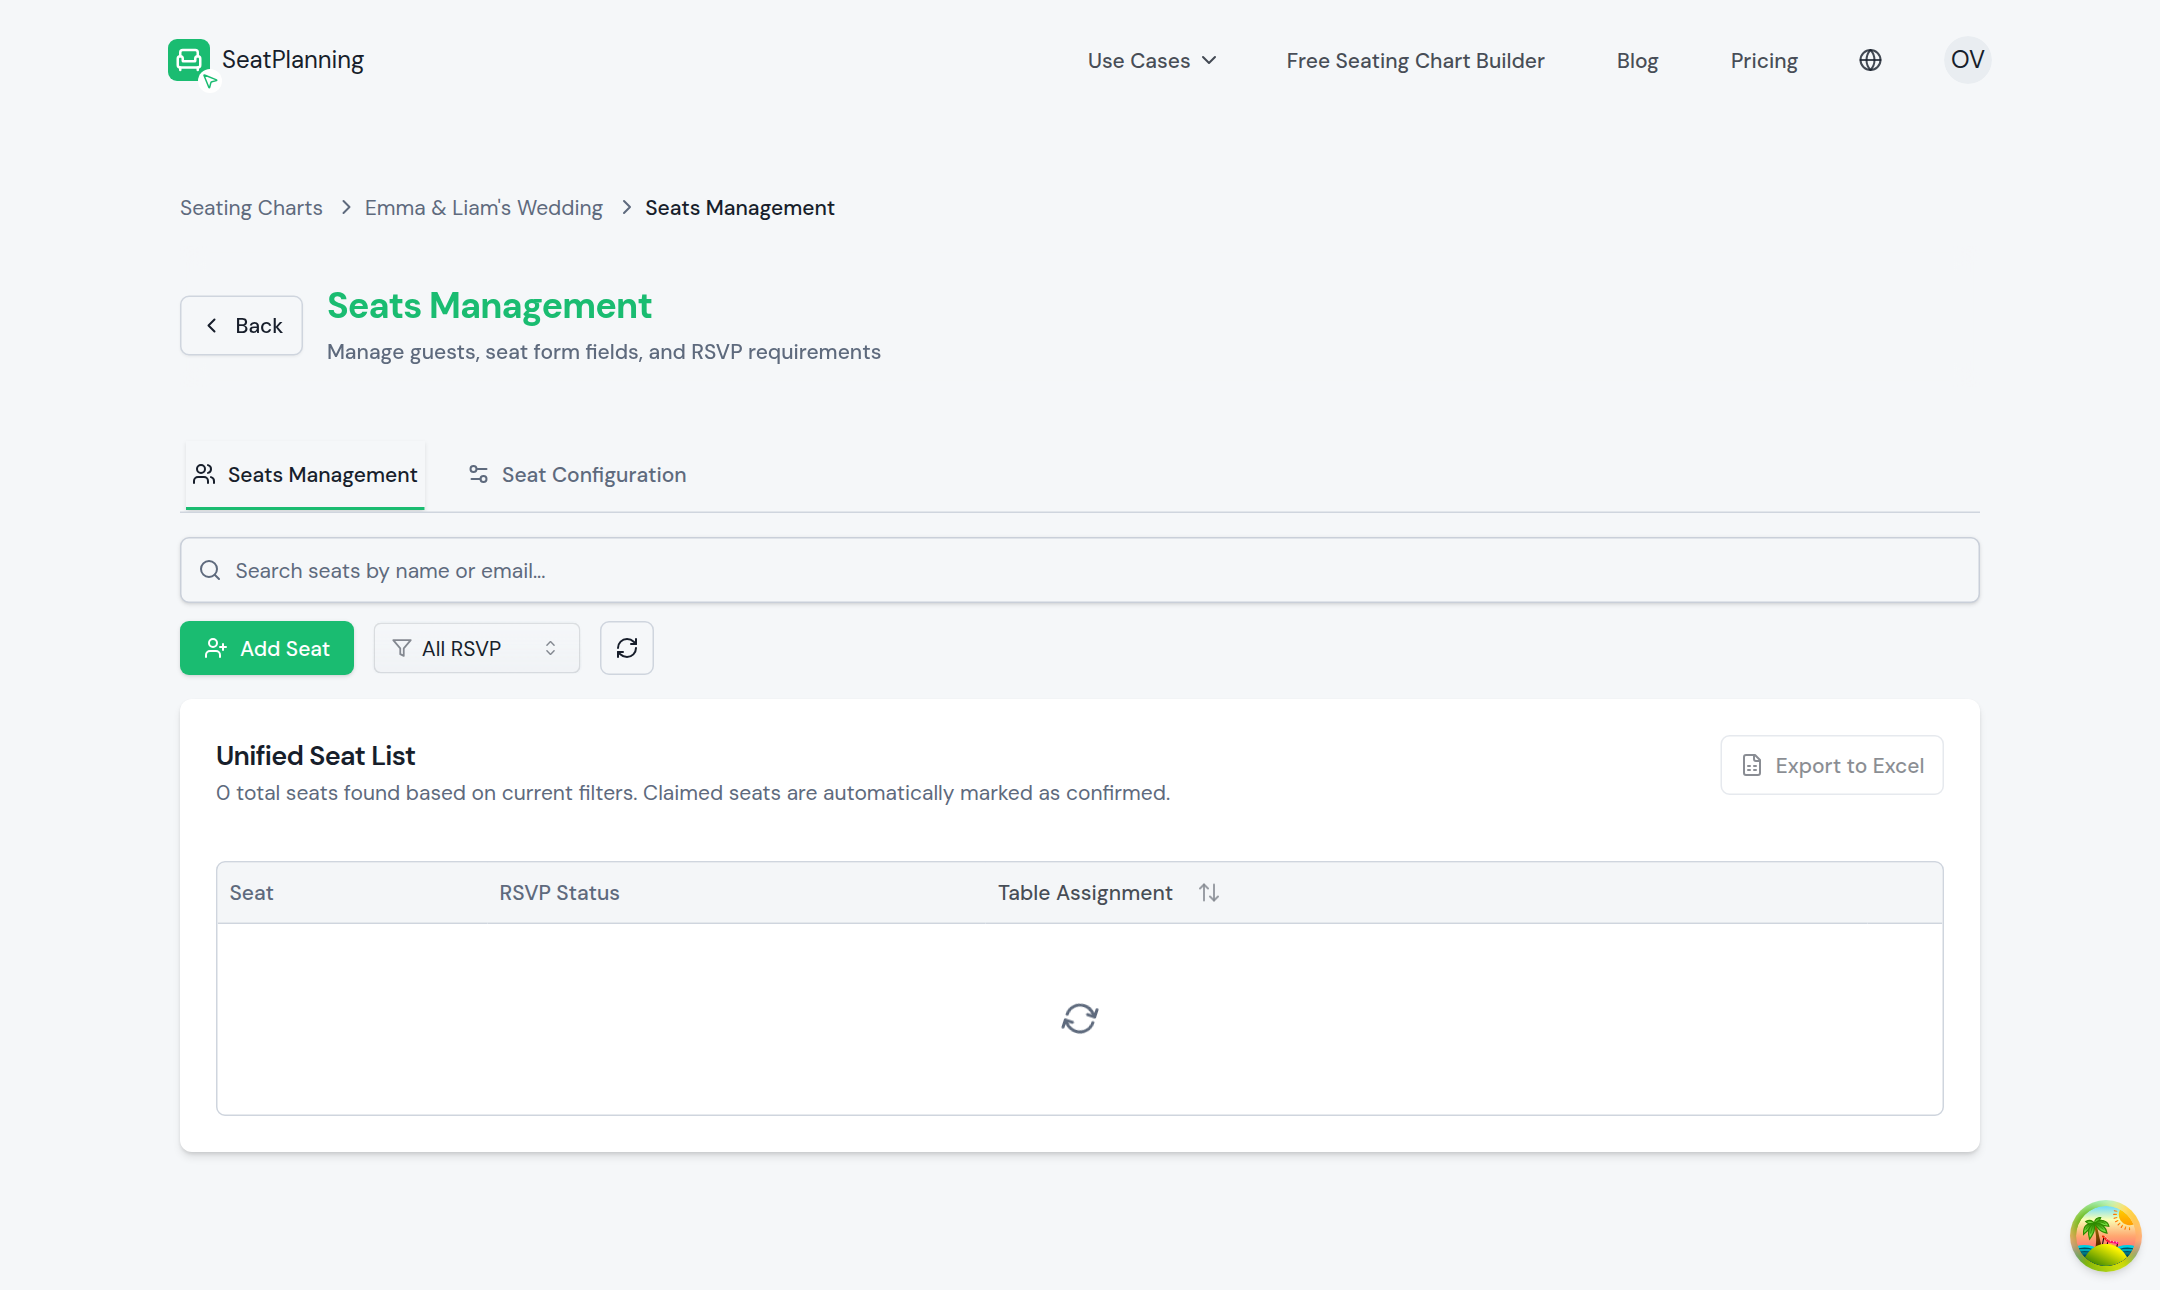
A seat doesn't need a name to exist. Place all your chairs first, then fill in names as people confirm, or import a full guest list and let SeatPlanning seat them for you. See Add guests manually or Import guests from Excel.
3. Choose how guests respond
Open Invite Guests from your chart's menu to reach the Invite Hub. The first step is your RSVP mode, the same setting used everywhere else in the chart:
- Manual Management Only: you track responses yourself, with no page for guests to visit.
- Public RSVP: guests search for their name on a page and confirm attendance.
- Digital Ticket & QR Entry: guests claim their seat by email and get a ticket with a QR code for the door.
The rest of this walkthrough follows Digital Ticket & QR Entry, since it covers every stage from invitation to check-in. See Choosing an RSVP mode to compare all three in depth.
4. Design your invitation email
From the Invite Hub, choosing the email channel takes you to the email wizard. Design Emails is where you set the subject line, heading, body text, and the button your guest clicks. The live preview on the right always matches what actually gets sent.
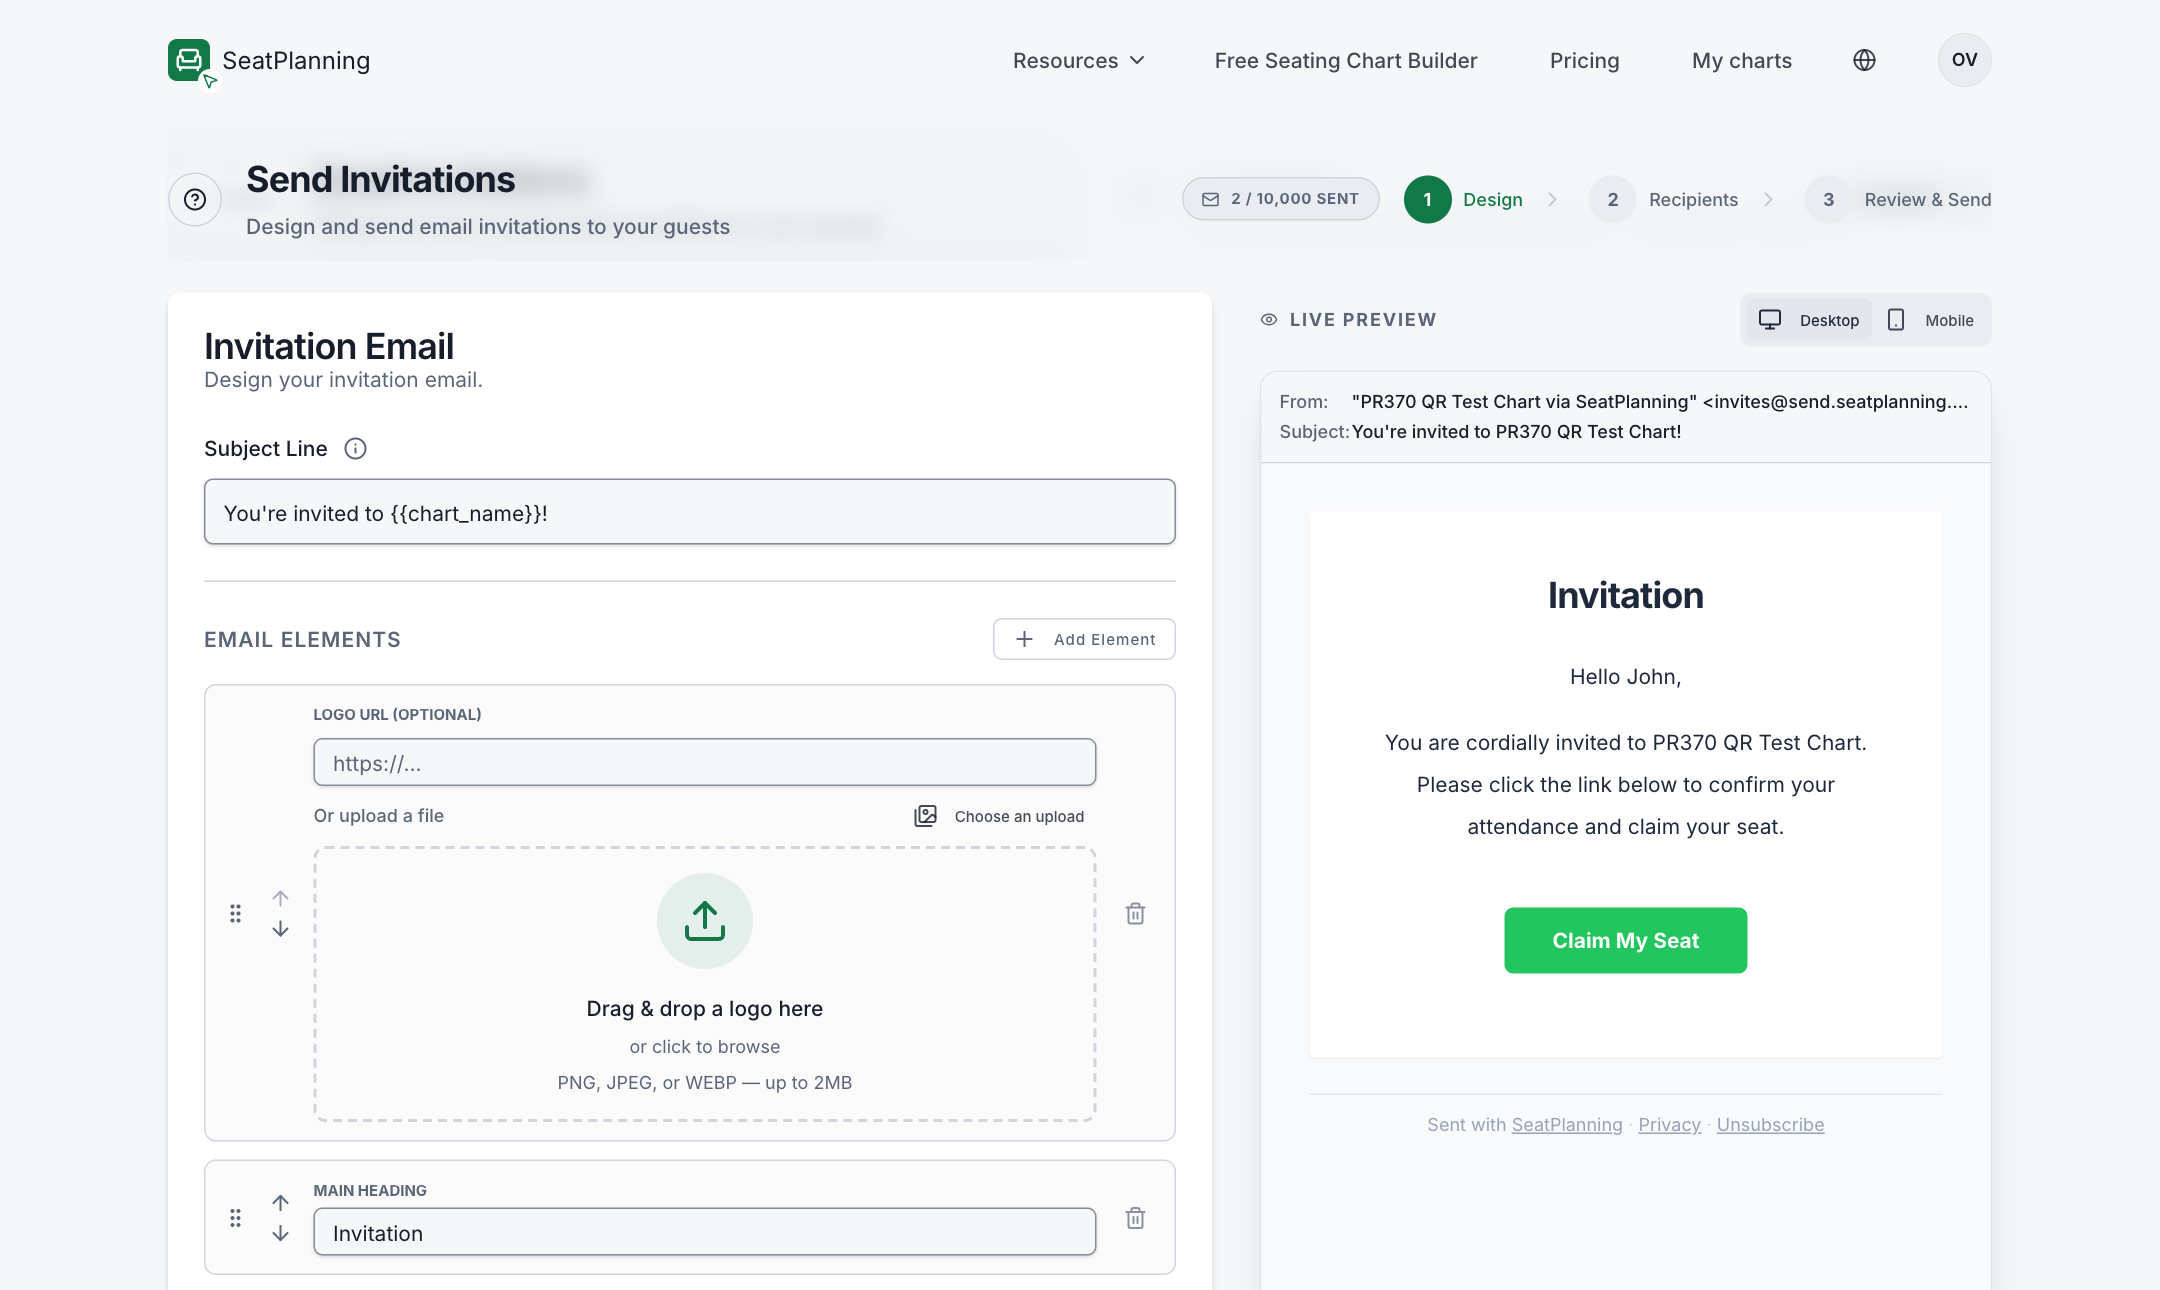
- 1Set your subject line and add or remove elements.
- 2Live preview: exactly what your guest will see.
- 3The claim button. Every guest gets their own personal link here.
Placeholders like {{first_name}} and {{chart_name}} fill in automatically for each guest. If you remove the claim button by mistake, SeatPlanning warns you and offers to put it back, since it's the only way a guest reaches their seat. See Design email templates.
5. Send invitations, or send tickets directly
The next step is choosing who gets the email. You have two options for what to send:
- Invitations: guests claim their own seat, then get their ticket automatically.
- Tickets: skip claiming and mail the QR ticket straight away, useful once you already know who's coming (for example, guests you're marking as confirmed yourself).
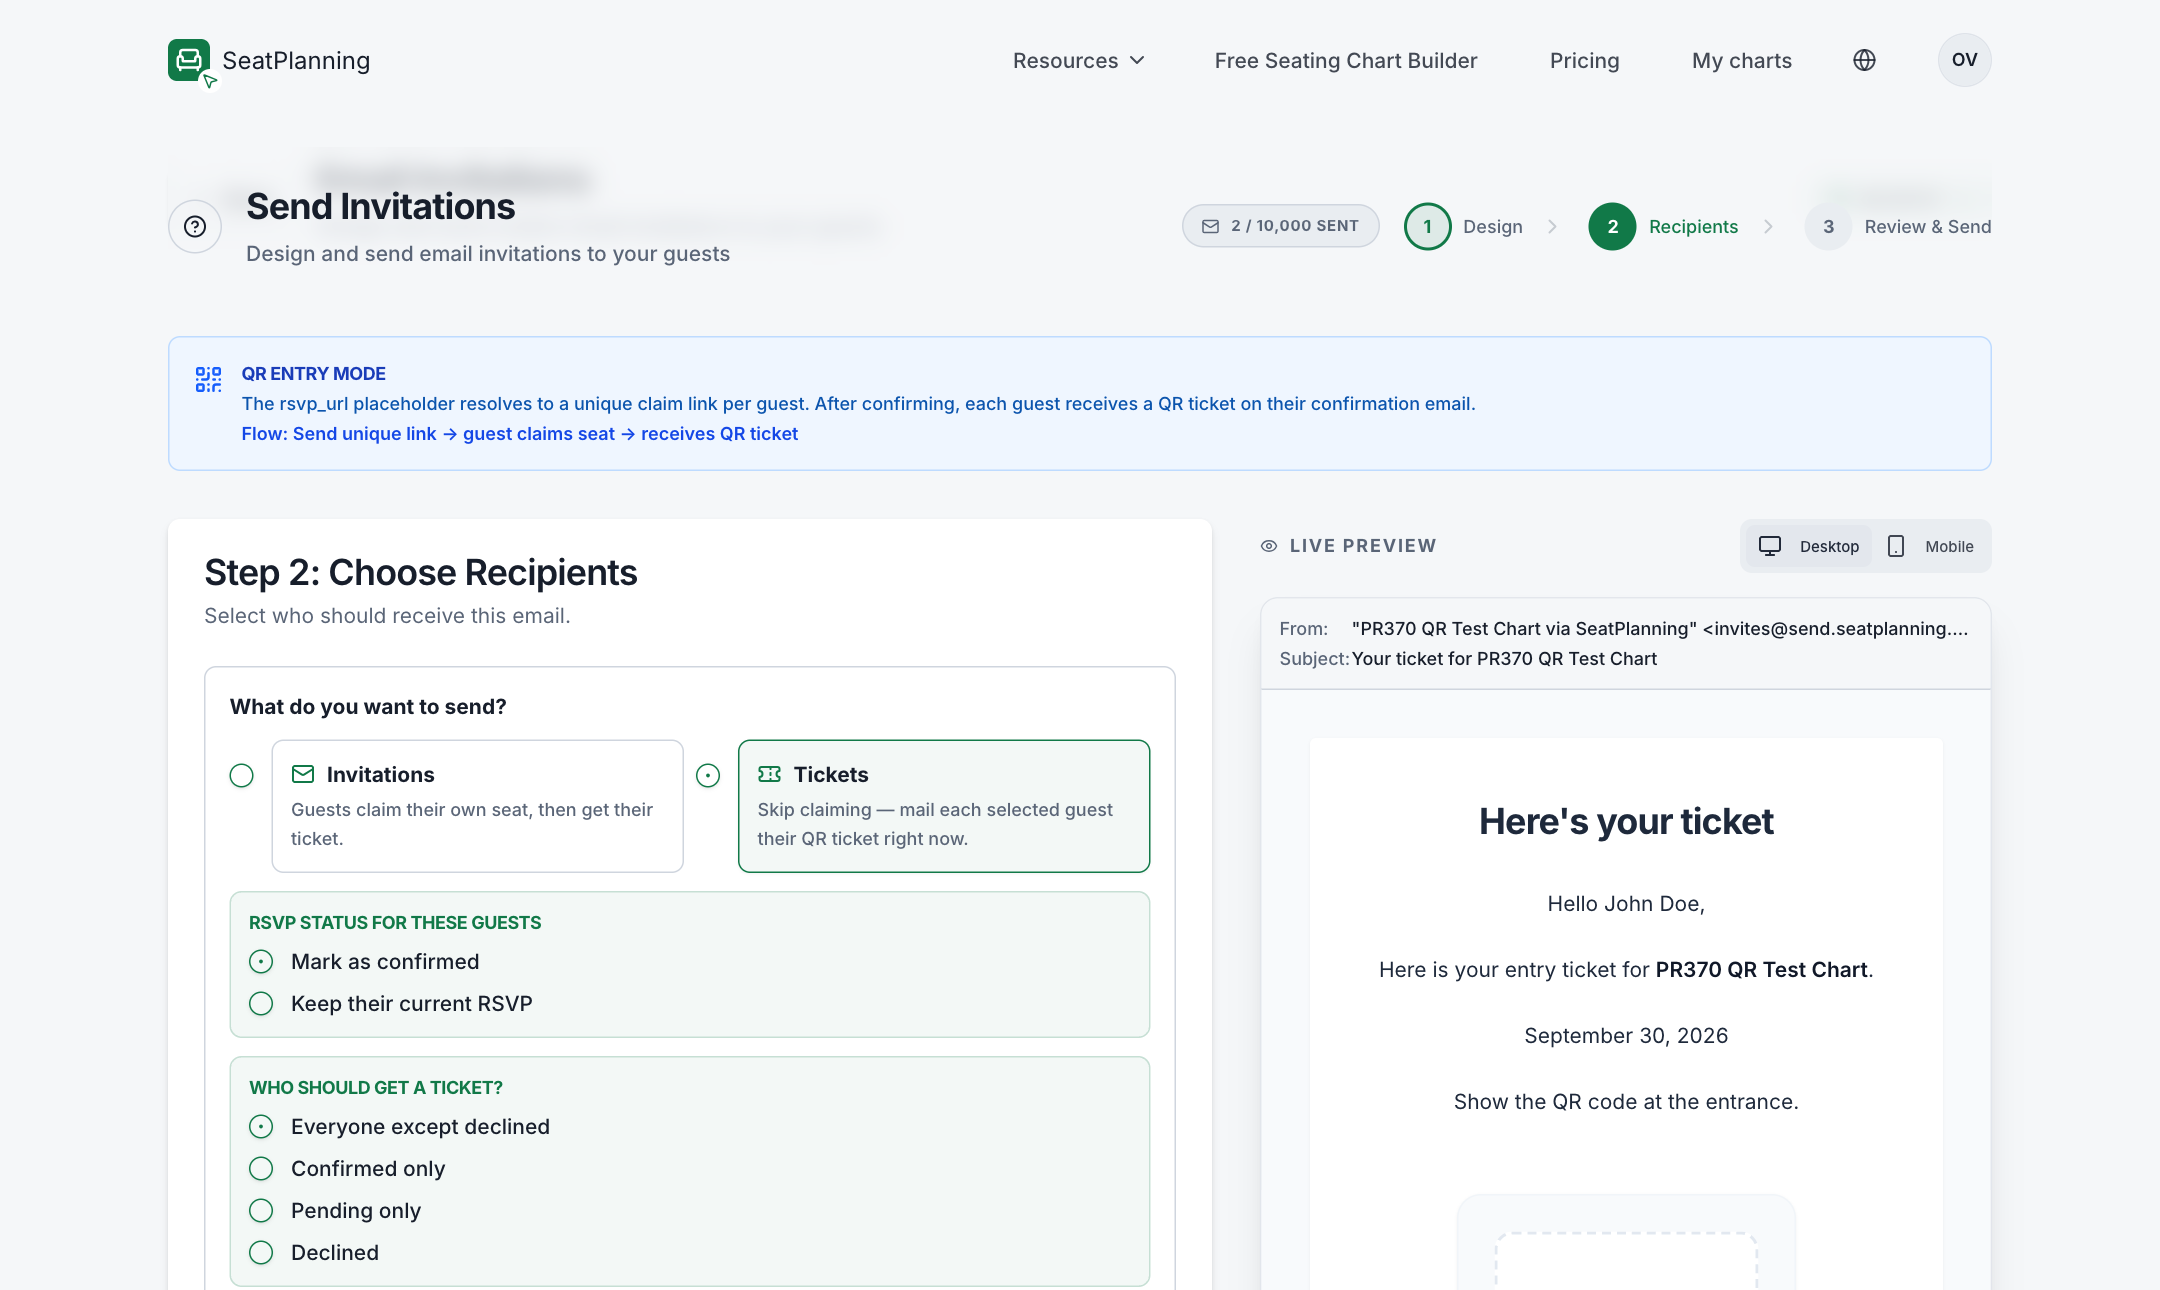
- 1Send tickets straight away instead of asking guests to claim first.
- 2Filter who's eligible by their current RSVP status.
Declined guests are excluded by default, so you won't accidentally ticket someone who said they can't make it. Once you send, a results screen lists anyone who was skipped and why (for example, a missing email address), and the Sends tab keeps a record you can resend from later. See Send email invitations.
6. What your guest sees
A guest who receives an invitation clicks their personal link, confirms a few details, and lands on a confirmation screen with their ticket and QR code attached. A guest who was sent a ticket directly gets that ticket straight away, no claiming step needed. Either way, the ticket is tied to their seat: if you move them to a different table afterward, their existing QR code still works.
7. Check guests in at the door
On the night, open your chart's scanner page. Point a phone camera at each guest's QR code for an instant green or red result, or search by name if a code won't scan.
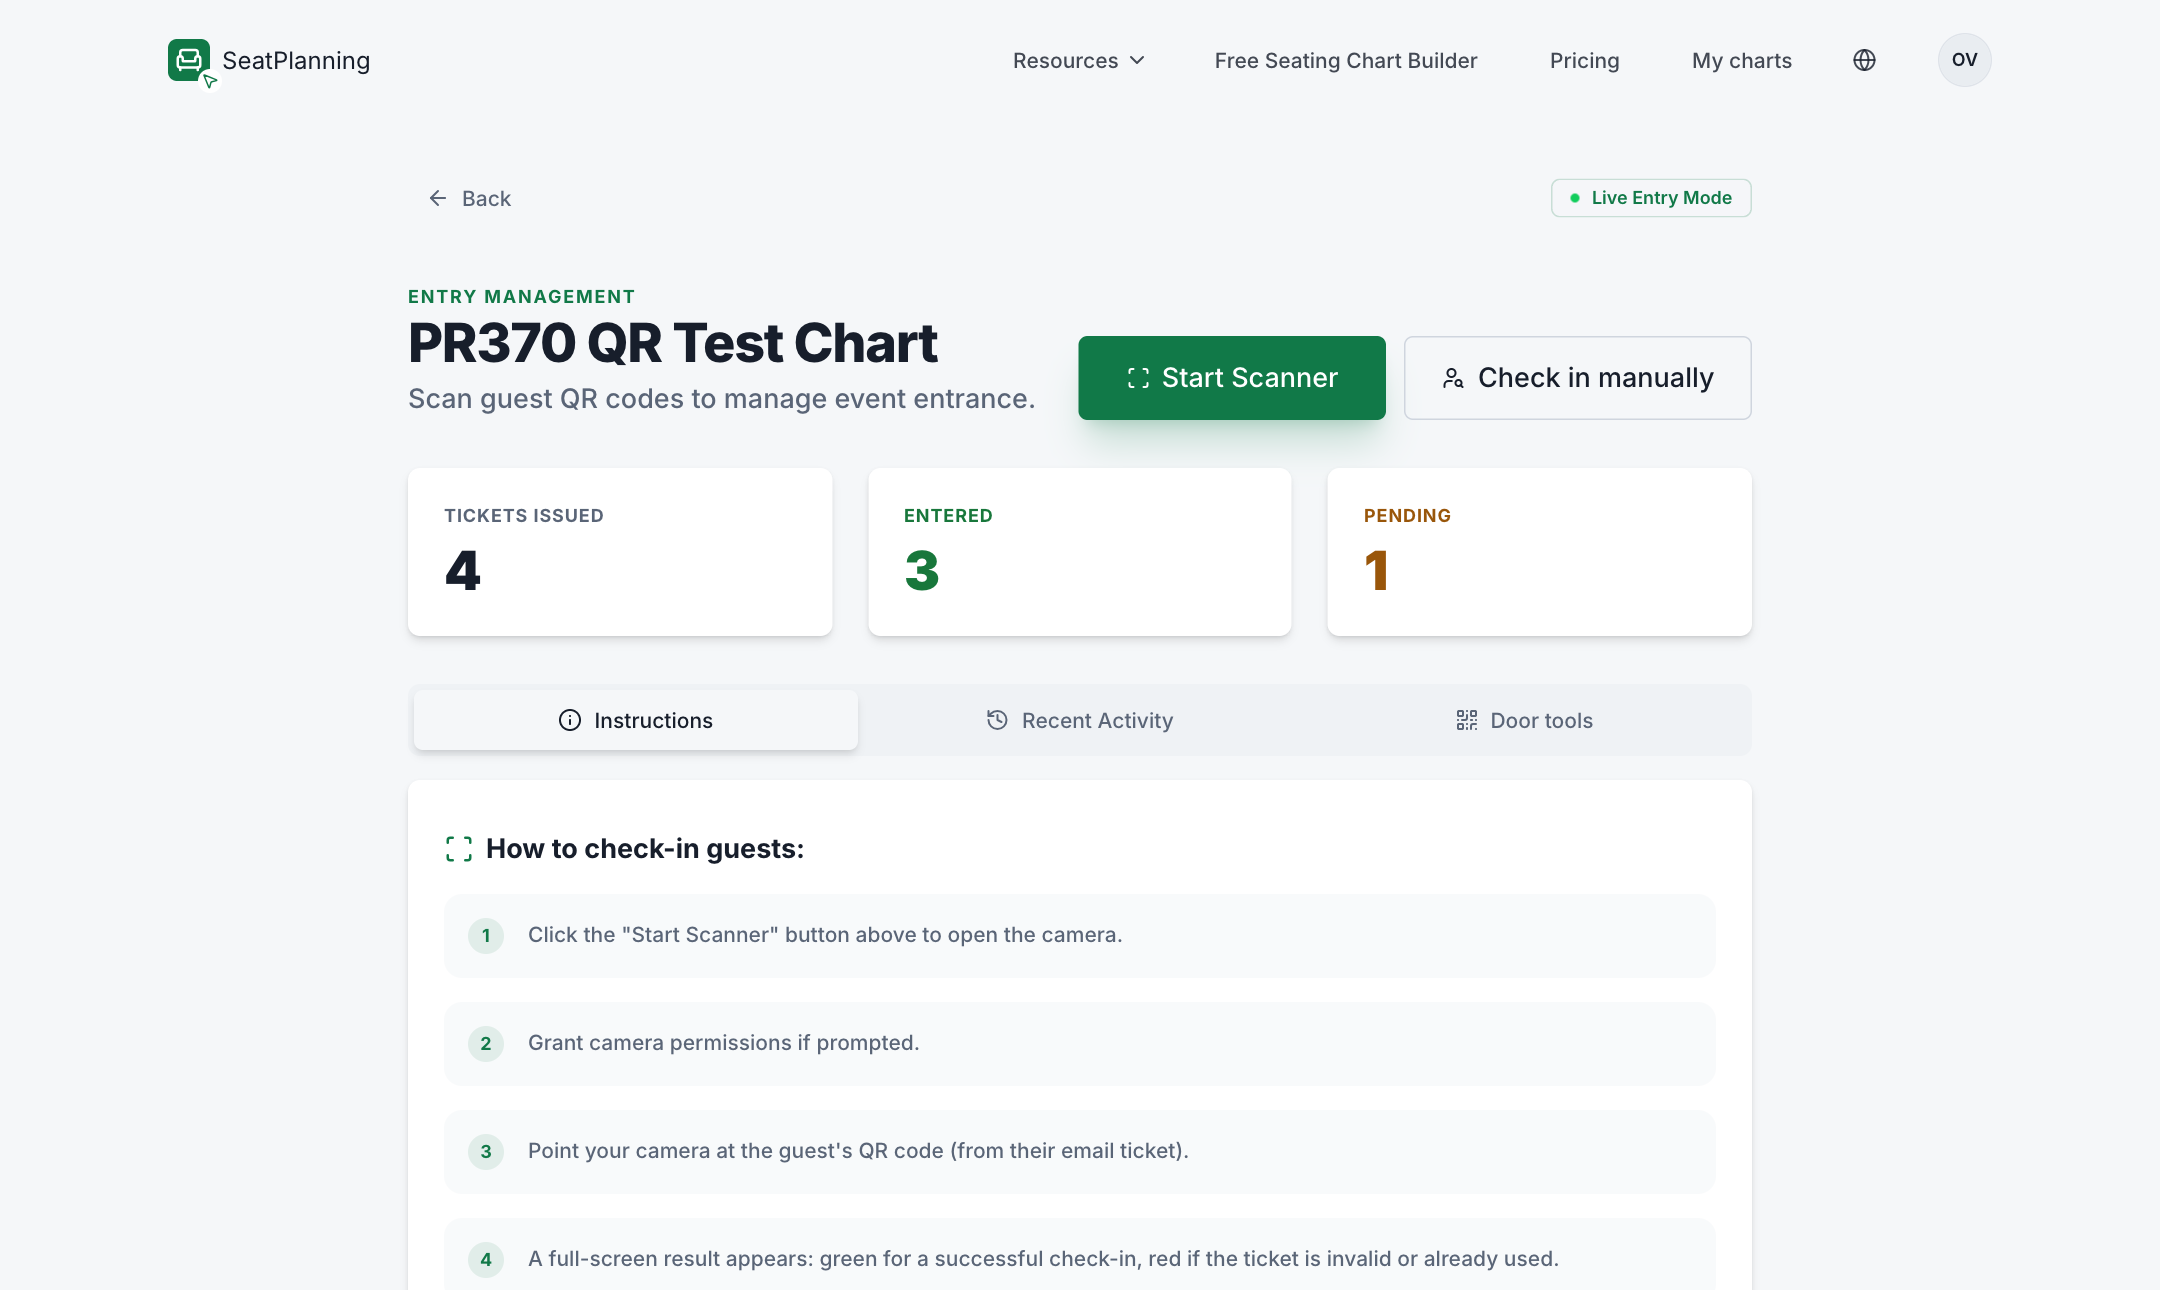
- 1Start the camera scanner, or check guests in by name.
- 2Live counts: tickets issued, entered, and still pending.
If you're not the one holding the phone at the door, you can hand a staff member a scanner link that works without their own account, or download a printable guest list as a backup. See The door scanner and live entry.
Where to go next
- Create your first seating chart for the chart-creation wizard in detail.
- The Invite Hub, step by step for the guided invite flow this walkthrough summarizes.
- Enable QR entry if you want to turn on ticketing for a chart that's already using a different RSVP mode.
- The door scanner and live entry for everything available at check-in, including staff scanner links and the printable door list.